French Canoe
(or Freedom Canoe, if you prefer)
by Rodolphe
Clauteaux
Dear Chuck:
I had a very brave accident of my heart three years ago. My
aorta artery exploded. Then I reduced the speed. And, because
I cannot anymore pilot an aircraft, I decided to build one.
But because I have a small house in a forest close to a lake,
I began to be interested by boats. Then, I began a long long
long research on the Net.
Nothing in French pages, a lot,
in English ones !!! I was looking for small boat plans. But
how to decide between so many offers ?
Then, I bought several books:
"The
Canoe Shop" by Chris Kulczycki ; Canoes and
Kayaks for the Backyard Builder" by Skip Snaith ; "Ultralight
boatbuilding" by Thomas J. Hill ; "Devlin's
boat building", by Samual Devlin ; "The
art of the Canoe with Joe Seliga", by Jerry Stelmok and
D. Sussex. This last one is the best one. It does not explain
how to build one canoe. It shows how a man of the art builds
the ones he sells and gives a lot of wonderful pictures of these
state of the art canoes.
In the book by Kulczycki, and
in the one by Devlin, the reader could find some plans and the
way to build canoes. I didn't do it. I didn't find it. I didn't
understood the methods.
The glued lapstrake methods for example. I tried it THREE TIMES
!!!, with and without jigs, molds and strongback (yes, with
AND without).
I tried also to build the Redwood
canoe which can be found at this address.
I did not get results. I am maybe too stupid to understand the
way THEY build it.
Suddenly I discovered Duckworks
Magazine !!!
And my life changed. My doctor
found me more healthy, my wife more affectionate, and my backyard
more busy. Yes, all that because I found in your fabulous www
monthly this article :
Build
Your Own Canoe, Excerpted from : "How to build
your own boat from scratch" by John Traister, an article
which may be a version of the Canoe "Glide
Easy".
Everything that was lacking
in the Svenson reproduction of Science Magazine article, was
in the Duckworks one !
I found America, that the hearth
globe is round, and an egg can stand up on its tip. After that,
it has been only a question of ply, saw, glue and so on. My
Canoe, French or Freedom Canoe, as you want, was born.
your friend,
Rodolphe Clauteaux
Dupont.Dupond@wanadoo.fr
----------------------
This is the first step. Which
arrives:
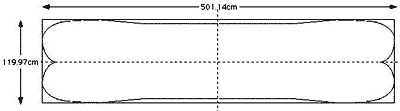
Image A - cutting the ply
AFTER : Cutting the ply which
comes in 8 by 4 foot, (see Image A Cutting the PLY) in four
halves -
Image B - cutting the ply holes
AFTER : Making the holes (see
Image B Cutting the PLY - Holes). Holes destined to make the
sewing with plastic ties (for electric cables) -
Image C - cutting the ply - curbs
BUT BEFORE :Gluing the rounded
planks cut in six millimeter ply (see Image C Cutting the PLY
- Curbs).
To glue the rounded planks, we
have to sew through the ply planks cut as it is more or less
shown in the Image "A Cutting the PLY". It's for this
reason that we dont have to make holes in the straight borders
of the halves, borders which will become the bottom of the canoe.
This part of the canoe will be glued by the planks (the rounded
and longitudinal ones, and the transversal one).
NOTE : I have, HERE (rounded
planks and so on) begun to change the process of the Duckworks
article. And it is may be the reason I could finish her.
IMPORTANT NOTE : all the measures
have to be taken from the picture (figure9-8.gif)
in the Duckworks article.
.
Canoe A bis
Image CANOE A bis - shows approximately
the forms of the "rounded planks", and the place where
they have to be glued.
Canoe A bis bis
Image CANOE A bis bis - Shows
the same things as A bis but also the transversal planks which
will join FIRST the FOUR halves.
Canoe B
Image CANOE B - Shows the installation
of the outer gunwales.
First lesson of this
construction: WE DON'T have to install the out gunwales FIRST.
But instead, install first the in gunwales! Because when comes
the time to cover the hull with fabric (as I did), It would
be more effective to use this piece of wood to glue better (wihtout
or with fewer wrinkles) the red piece of fabric.
Canoe C
Image CANOE C - Shows
again the installation of the OUT gunwales.
Canoe C bis
Image CANOE C bis - Shows the
part of the primitive hull which I cut
Error !!! Second lesson
of this construction. In the next canoe (if my wife let me do
one, I will cut off these tips (spikes?) and have less shear.
It would be a nicer designed canoe, (more "native")
with them, though, and I guess, in white waters, more effective,
but more sensitive to lateral winds.
Canoe C bis bis
Image CANOE C bis bis
- Shows the hull with the tips cut and the OUT gunwales glued
Canoe D
Image CANOE D - Shows
the OUT gunwales installed and the first thwart I designed (I
made FOUR!!! till the last one which I installed upside down!!!)
Canoe E
Image CANOE E - Shows another
point of view, and the step just after CANOE D Because at this
time (D), I was thinking my canoe had a good form. But studying
better, it appears that it was too narrow. It's THEN only, (CANOE
D) I thought to fix and glue the famous "rounded planks"
along the bottom of the canoe.
This image shows also
the installation of one of the breasthooks. I had difficulties
gluing the triangular pieces of wood. I made a special wooden
form which has a cavity in the form of the breasthook, and that
can help to clamp it.
Canoe F
Image CANOE F - Shows
the result of all that work which cost three monthes of week-end
in this spring. I added the ribs which gave rigidity and allowed
the IN gunwale to be glued, leaving spaces which are not artificial
(with blocks of wood) as they are too often are in the plans
of ply boat construction.
Canoe G
Image CANOE G - Shows
her belly. The keel which is not indispensable, it adds weight,
is made of several pieces of ply, screwed and glued. The curved
parts are made of the same pieces of ply, same measures, but
with a longitudinal cut in the center, to be curved. The ends,
which are very narrowly curved, are cut appart, in two pieces
for each end, and glued.
Canoe H
Image CANOE H - She is
making love for the first time with her spouse, lake water.
Note she is well balanced. A fact which astonished me !!!
Canoe I
Image CANOE I - She is
not too bad. Very quick to the paddle. Very sensitive, may be
too much (see the next image).

Canoe J
Image CANOE J - Yes, first
naufragium, first shipwreck, when my elder son goes up with
me.

Canoe K
Image CANOE K - But the
solution exists. Pontoons. I made the same that are described
in the article in Duckworks Magazine. For a sailing canoe, it
seems useful to build them. And this canoe has to become a sailing
canoe. But that an other tale.
Canoe L
Image CANOE L - She is
like that today. You can notice a small block just on the center
twarth. It is the system to hold the centerboard. But it is,
again, an other tale.

Canoe M
Image CANOE M - Just because
you build at home on part time basis, doesn't mean that you
can't try to finish your creation. This blazon has been in my
family for four centuries.