|
Dragon's Egg
by Michael Birch
Dragons Egg is the first real size build, to test a modified Junk configuration, using 2 front dagger boards
and an adjustable depth rudder. The dagger boards can be used in water of less than 15" deep since there are two of them the effective area is the same as one deeper dagger board. The idea is to have a sailing vessel that can operate in very shallow water.
Why build something like this.
Well first of all the basic system is tried tested and very low tech, therefore very suitable to home boat
building and experimentation.
Secondly, how many sailors have wanted to try different sails but can't because the balance between the
centre of lateral resistance of the hull, and the centre of effort of the sail doesn't allow them to try
other rigs.
The problem can be solved easily by using the Junk configuration, simply adjust the depth of the rudder to
balance the two forces and use any rig.
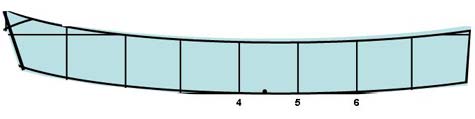
Construction is nail and glue. The boat is 7'6" at the waterline with a beam 0f 48 inches positioned at 60%
of the OAL. The reason for this is the mass will be centred there to give the best waterline length. (see
photos when they arrive)
I don't expect this boat to be fast, about 4.5 knots hull speed. I do expect it to be easily maintained,
easily built, easily transported and cheap. As far as design is concerned, the sides are fairly low so when
heeled it will take on water along a short length of the gunwale, hopefully warning the skipper before a
total capsize. It does have about 500 lbs of flotation (30% of which is above the lowest point of the
sides). I see re-entry as a problem with this designs profile, but since I wanted this to look like a
Chinese designed craft, and I'll only be sailing on small lakes and canals this isn't a problem. (I'm a good
swimmer) The sail rig is going to be around 55 square feet as a fully battened balanced lug sail. Not with
true Junk rigging but still easy to handle and it'll look the part as well.

Materials
-
All sheet materials are WPB exterior 6mm plywood.
-
All framing is 1" x 3/4" softwood
-
Nails are Bronze boat ring nails
-
Glue Balcotan waterproof boat glue
Tools and Equipment
-
Panel saw
-
Tennon saw
-
Hammer
-
Small DIY hand held electric planer
-
Sanding block and papers also a DIY belt sander
-
50 x 100mm jaw DIY clamps
-
Sliding bevel
-
Try square
-
Hand operated drill and power drill
-
Workmate type bench
-
2 home made saw horses
Construction Log
12-3-05 2 Hours.
Cut out floor and sides
13-3-05 2 Hours.
Nail and glue first lamination of internal chine logs 3/4" x 1".
15-3-05 1 Hour.
Clamp and glue second lamination of internal chine logs 3/4" x 1".
16-3-05 1 hour.
Clean up glue squeezed out between chine log laminates. I used Balcotan
which uses moisture to cure and foams to fill voids when exposed to damp or damp air. Fairly
easy to clean up though, as long as you catch it before it fully cures.
10-4-05 1.5 hours.
Cut out bow and stern transoms together with bow and stern bulkheads. I used a hand panel
saw for these, the longest cut being 4 feet. I have to say doing it this way rather than
using power tools, proved easy. Just let the saw do the work and take it easy. You'll get
a 2 cm. cut with each stroke on 6mm plywood, and you can control it well. I'm no joiner but I was never more than 1.5 mm out on the line, pretty good for me. I think the problem with
long cuts and power hand tools is that they can easily run away from the line.
From now on I'm going to try and do 1 hour a night after work, weather permitting. I know
from many years of building large complex radio controlled gliders, that doing this means you don't get over tired and make mistakes. Another benefit is long boring repetitive tasks
are broken down into small achievable bite size pieces. It's pretty daunting to face cutting
out 160 aerofoil wing ribs believe me.
15-4-05 1.5 Hours.
Clamp and glue framing onto bulkheads and transoms. Tomorrow I'll take the angles off
the hull floor with a sliding bevel. Using my small plane to bevel the edges of the framing
for a good fit.
16-4-05 1 Hour.
I marked off the angles on the framing edges and used the small hand held power planer to
plane down the bevels so the transoms and bulkheads will sit square. This piece of equipment
is probably one of the most useful tools I've ever bought and as a DIY spec it's cost was
only around £26 UK or $37 US. It really is versatile and saves a huge amount of time, I'd
recommend it and a belt sander to any boat builder. Tomorrow I have social commitments so
no work on the boat then.
18-4-05 1.5 Hours.
Using a hand drill, I pre drilled all the starter holes for the nails through the plywood
panels. I use a 1. 5mm drill bit and when fixing use a small bead of Balcotan glue on the hole
before inserting the nail. This seals the hole and the excess can be wiped off the wood
before it dries.
20-4-05 1 Hour.
General tinkering, cleaning up edges etc. and trying to figure out the best way to do the
assembly.
21-4-05 1.5 Hours.
I'm now at the stage where I need a run of at least 4 hours continuous work to nail and glue
the main components together. I had been hoping to do this over the last weekend, but a
combination of late night partying and heavy rain prevented me doing any work. Since it's
still early in the year and daylight won't be available after 8:30pm in the evenings. I'll
have to wait for a good weekend to knock it all together and then the real work can begin.
22-4-05 Thoughts on sail and colour.
I had been going to use polytarp for a sail, but the only colour I could find in the UK was
blue. Now I'm finicky about colour, so I had an email discussion with the manufacturer in
the States. On their web site they have some attractive colours, but by the time I get
them to England the cost just about doubles. Problem, what am I going to do? One of my other
activities when the kids were young was making kites and rip stop nylon is relatively
inexpensive, at a weight of 48grams per square metre. Since a junk sail is very lowly
stressed this will be quite adequate and I got 14 sq. mtrs. delivered for £33.00 UK a little
more than importing polytarp from the USA. The colour I've chosen is red, and I havent
decided on the hull colour yet, probably black with red trim or cream with black and red trim
I'll have to think about it.
The weather has turned fair so there's a good chance I can put the basic hull together
tomorrow. I'll also be taking picture of the parts and hull assembly to post. Basically this
is going faster than I can get the pictures done for the web so by the time you see all this
the basic hull will done.
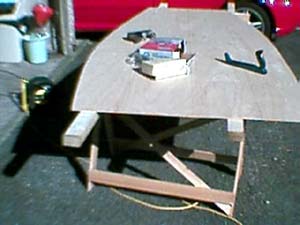
23-4-05 2.5 Hours.
Well it was a nice day and I got stuck in about half past nine in the morning. First thing was
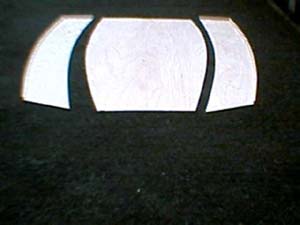
to lay out the parts for photographing. For some reason the pictures of the parts were very
over exposed so I havent included them, by the time I found out it was too late. Below is the
building sequence
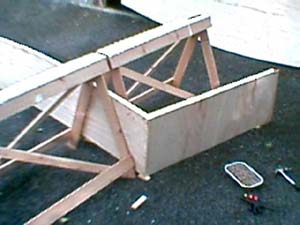
Working on your own is a little difficult, as you can see I had to use my saw horses
to keep the side and the floor together so I could nail and glue them.
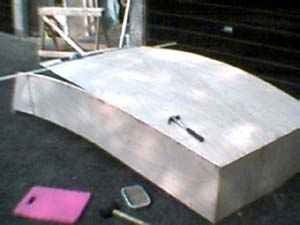
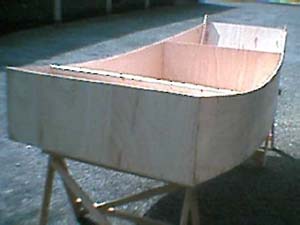
It's self supporting now.
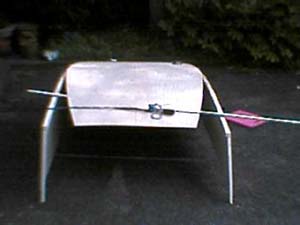
This was as far as I could get without using a Spanish windlass. Note the pink kneeling pad
a must when your working on gravel.
Well here it is, the basic hull, now I can start to build it up. I found that the Spanish
windlass needs to be a heavy rope and that I would have been wise to extend the chine logs
and put it on them it would have been so much easier. As it was I couldn't get the last 1/4
inch on each side to touch the bow transom framing. I nailed and glued but I will use
fibreglass tape and resin inside and out do seal and make it strong. Having said that when
the twin dagger board casings go in it really will be strong.
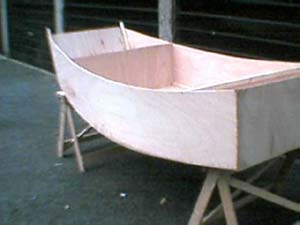
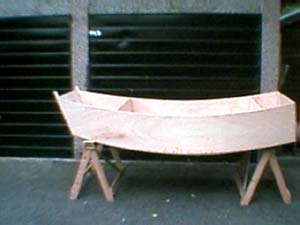
Another view
And a side view
|