| 
Dragon's Egg
by Michael Birch
Dragons Egg is the first real size build, to test a modified Junk configuration, using 2 front dagger boards
and an adjustable depth rudder. The dagger boards can be used in water of less than 15" deep since there are two of them the effective area is the same as one deeper dagger board. The idea is to have a sailing vessel that can operate in very shallow water.
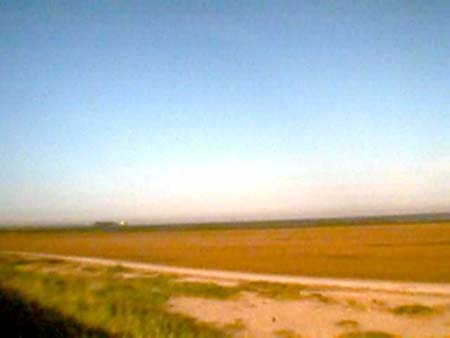
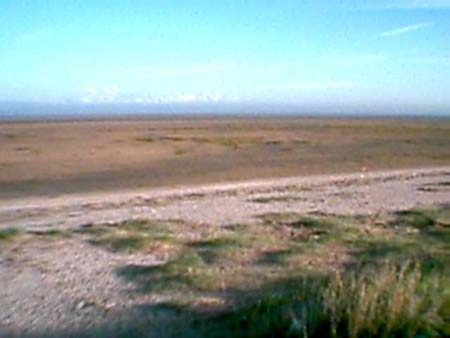
Why build something like this.
Well first of all see the picture below of my local beach. The tide goes out the best part of a mile and you have to go out around 200 to 300 yards at high tide to get 24" inches of water under the hull. Secondly the basic system is tried tested and very low tech, therefore very suitable to home boat building and experimentation.
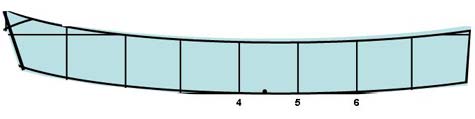
The third reason is that, many sailors have wanted to try different sails but can't because the balance between the centre of lateral resistance of the hull, and the centre of effort of the sail won't allow other rigs. See diagram below.
The problem can be solved easily by using the Junk configuration above, simply adjust the depth of the large rudder to balance the two forces and use any rig.
The construction of this craft is nail and glue. The boat is 7'6" at the waterline with a beam 0f 48 inches positioned at 60% of the OAL. The reason for this is the mass will be centred there to give the best waterline length. (see photos when they arrive)
I don't expect this boat to be fast, about 4 knots hull speed. I do expect it to be easily maintained,
easily built, easily transported and cheap. As far as design is concerned, the sides are fairly low so when
heeled over hard it will take on water along a short length of the gunwale, hopefully warning the skipper
before a total capsize. It does have about 500 lbs of flotation (30% of which is above the lowest point of the
sides). I see re-entry as a problem with this designs profile, but since I wanted this to look like a
Chinese designed craft, and I'll only be sailing on small lakes and canals this isn't a problem. (I'm a good
swimmer) The sail rig is going to be around 55 square feet as a fully battened balanced lug sail. Not with
true Junk rigging but still easy to handle and it'll look the part as well.

Materials
All sheet materials are WPB exterior 6mm or 12mm plywood.
All framing is 1.0" x 0.75" or 1.5" x 0.75" softwood
Nails are Bronze boat ring nails
Glue Balcotan waterproof boat glue
Tools and Equipment
Panel saw
Tennon saw
DIY Jig saw
Hammer
Rubber mallet
Small DIY hand held electric planer
Sanding block and papers also a DIY belt sander
50 x 100mm jaw DIY clamps
Sliding bevel
Try square
Hand operated drill and power drill
Workmate type bench
2 home made saw horses
Construction Log
12-3-05 2 Hours.
Cut out floor and sides
13-3-05 2 Hours.
Nail and glue first lamination of internal chine logs 3/4" x 1".
15-3-05 1 Hour.
Clamp and glue second lamination of internal chine logs 3/4" x 1".
16-3-05 1 hour.
Clean up glue squeezed out between chine log laminates. I used Balcotan
which uses moisture to cure and foams to fill voids when exposed to damp or damp air. Fairly
easy to clean up though, as long as you catch it before it fully cures.
10-4-05 1.5 hours.
Cut out bow and stern transoms together with bow and stern bulkheads. I used a hand panel
saw for these, the longest cut being 4 feet. I have to say doing it this way rather than
using power tools, proved easy. Just let the saw do the work and take it easy. You'll get
a 2 cm. cut with each stroke on 6mm plywood, and you can control it well. I'm no joiner but I was never more than 1.5 mm out on the line, pretty good for me. I think the problem with
long cuts and power hand tools is that they can easily run away from the line.
From now on I'm going to try and do 1 hour a night after work, weather permitting. I know
from many years of building large complex radio controlled gliders, that doing this means you don't get over tired and make mistakes. Another benefit is long boring repetitive tasks
are broken down into small achievable bite size pieces. It's pretty daunting to face cutting
out 160 aerofoil wing ribs believe me.
15-4-05 1.5 Hours.
Clamp and glue framing onto bulkheads and transoms. Tomorrow I'll take the angles off
the hull floor with a sliding bevel. Using my small plane to bevel the edges of the framing
for a good fit.
16-4-05 1 Hour.
I marked off the angles on the framing edges and used the small hand held power planer to
plane down the bevels so the transoms and bulkheads will sit square. This piece of equipment
is probably one of the most useful tools I've ever bought and as a DIY spec it's cost was
only around £26 UK or $37 US. It really is versatile and saves a huge amount of time, I'd
recommend it and a belt sander to any boat builder. Tomorrow I have social commitments so
no work on the boat then.
18-4-05 1.5 Hours.
Using a hand drill, I pre drilled all the starter holes for the nails through the plywood
panels. I use a 1. 5mm drill bit and when fixing use a small bead of Balcotan glue on the hole
before inserting the nail. This seals the hole and the excess can be wiped off the wood
before it dries.
20-4-05 1 Hour.
General tinkering, cleaning up edges etc. and trying to figure out the best way to do the
assembly.
21-4-05 1.5 Hours.
I'm now at the stage where I need a run of at least 4 hours continuous work to nail and glue
the main components together. I had been hoping to do this over the last weekend, but a
combination of late night partying and heavy rain prevented me doing any work. Since it's
still early in the year and daylight won't be available after 8:30pm in the evenings. I'll
have to wait for a good weekend to knock it all together and then the real work can begin.
22-4-05 Thoughts on sail and colour.
I had been going to use polytarp for a sail, but the only colour I could find in the UK was
blue. Now I'm finicky about colour, so I had an email discussion with the manufacturer in
the States. On their web site they have some attractive colours, but by the time I get
them to England the cost just about doubles. Problem, what am I going to do? One of my other
activities when the kids were young was making kites and rip stop nylon is relatively
inexpensive, at a weight of 48grams per square metre. Since a junk sail is very lowly
stressed this will be quite adequate and I got 14 sq. mtrs. delivered for £33.00 UK a little
more than importing polytarp from the USA. The colour I've chosen is red, and I havent
decided on the hull colour yet, probably black with red trim or cream with black and red trim
I'll have to think about it.
The weather has turned fair so there's a good chance I can put the basic hull together
tomorrow. I'll also be taking picture of the parts and hull assembly to post. Basically this
is going faster than I can get the pictures done for the web so by the time you see all this
the basic hull will done.
23-4-05 2.5 Hours.
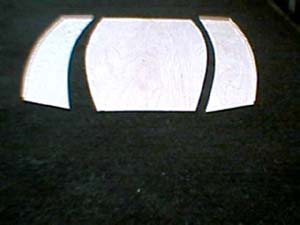
Well it was a nice day and I got stuck in about half past nine in the morning. First thing was
to lay out the parts for photographing. For some reason the pictures of the parts were very
over exposed so I havent included them, by the time I found out it was too late. Below is the
building sequence
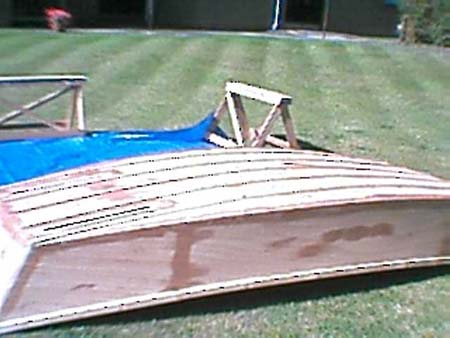
Working on your own is a little difficult, as you can see I had to use my saw horses
to keep the side and the floor together so I could nail and glue them.
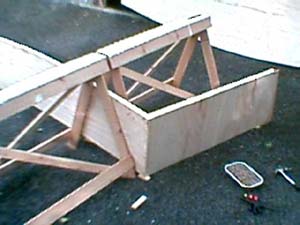
It's self supporting now.
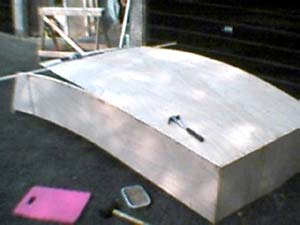
This was as far as I could get without using a Spanish windlass. Note the pink kneeling pad
a must when your working on gravel.
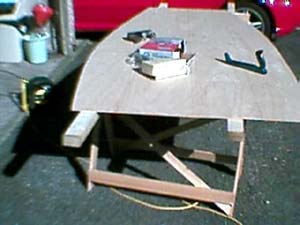
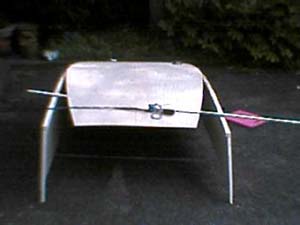
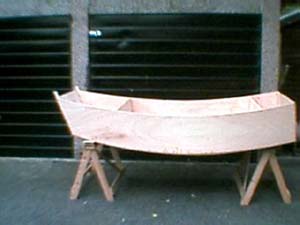
Here it is, the basic hull, now I can start to build it up. I found that the Spanish
windlass needs to be a heavy rope and it would have been wise to extend the chine logs
and put the rope on them rather than around the sides. It would have been so much easier.
As it was I couldn't get the last 1/4 inch on each side to touch the bow transom framing.
I nailed and glued but I will use fibreglass tape and resin inside and out to seal and make
it strong. Having said that when the twin dagger board casings go in, it really will be
strong.
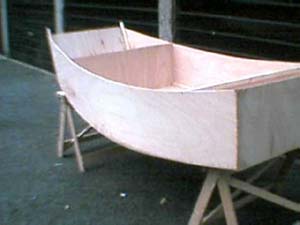
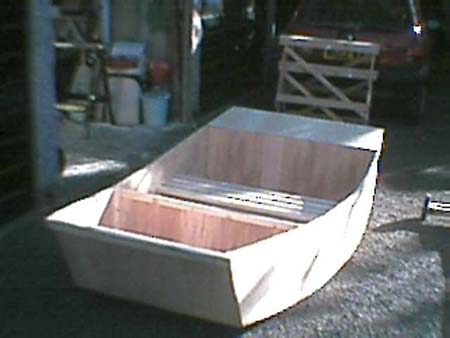
Another view
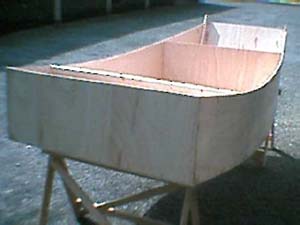
And a side view
3-5-05 Progress Report.
Not much to report lots of social stuff getting in the way. I have started to make a dolly
so that I can wheel the boat in and out of the garage on its side, thus preventing scratching
and a bit of effort. Although it can be lifted at the moment with 1 hand under the side and
standing up, it is awkward. Next job is to do the inner and outer wales.
4-5-05 1.5 hours.
When I got the hull out of the garage and onto the saw horses, I discovered due to the
hull being stored on its side and because of the long setting time of the glue; the weight
had pulled a length of the floor away from the bottom of the port side chine runner. The gap
is about 9 inches long and about 1/4 inch wide at the widest point. It hadn't come completely
away, so it would be water tight but needs filling with epoxy before the edges are taped.
I screwed the port gunwale in place which made that side much stronger and more fair. As
I was now running out of daylight I decided to finish the dolly which made putting the hull
away so much easier. Next time the starboard gunwale.
7-5-05 1.5 hours.
I fitted the starboard side gunwale and extended around the front of the bow today. On these
gunwales I have used screws instead of ring nails. There are two reasons for this. Point one,
I don't like the fact that ring nails can pull out so easily when under stress, the nail gauge
is too narrow. Point two, in England we live fairly close together and the banging of nails
will disturb people, screws hold better are quiet and I like the nice slow, relaxed building
process.
8-5-05 2.5 hours.
Today I screwed the bow bulkhead in place through the floor and sides, using 3" spacing, I
simply don't trust the ring nails. I really like this way of doing things it's pleasant to
work in the sunshine on an unhurried task, it's very stress busting and restorative.
Once this was done I decided to fit a seat mounted across the beam using 2"x 1" . It's
mounted on runners permanently attached to the sides. the seat rails however are removable
from the side supports. The seat adds to the structural strength, although at this stage its
position is guesswork. It may have to be moved forwards a bit, we'll see.
I cut out the plywood top panel and fitted it to the top of the stern flotation box. This is
removable and sealed with bathroom sealer, making access for repairs to this area easy.
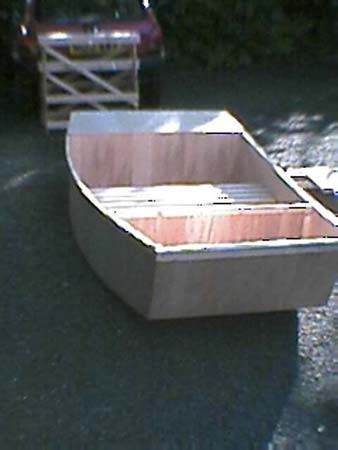
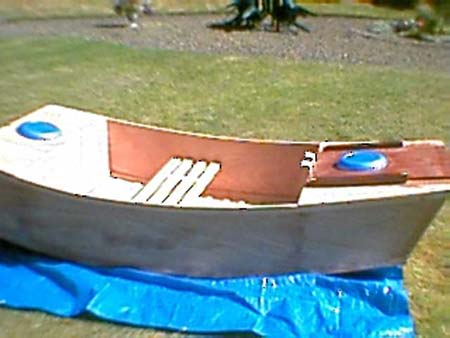
Well it's beginning to look like a boat now. This coming week I'll
complete the inner wales and fit the mast step
As you can see the camera, (it's only a tiny web cam) has foreshortened the image, in real
life the boat looks cute as my wife Dianne says. It is going to turn out even better than I
thought by the looks of it.
11-5-05 2 hours.
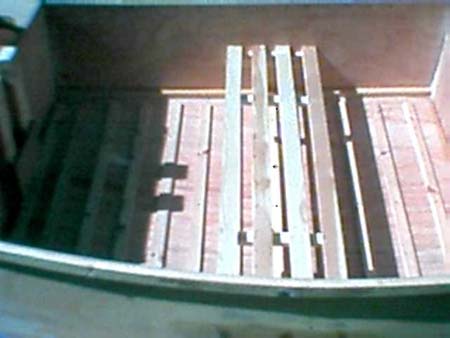
I cut 1.5" x 0.25" batons and screwed and glued at 6" intervals across the beam of the
cockpit floor leaving a 2" gap between the ends and the chine logs.
During the day I did a bit
more research on sculling oars and Yulohs. I'll defiantly go down this route for aux power.
Like just about everything to do with junks and sampans it's low tech and you can see how
efficient once you've examined the physics of what is going on.
12-5-05 1.5 hours.
This evening I fitted the first 3 of 5 external hull floor runners screwed and glued
at the ususal 3" intervals.
I had a very weird perceptual experience this evening. I was tidying
up, and picked up the bow to put it on the dolly. Up to this point I had always felt I was
working on pieces of wood that would eventually become a boat. At the moment when I picked
it up, it suddenly became a solid boat. It was a very strange feeling that I can't really
express properly, it really surprised me.
A question for all you other boat builders out there.
Has anyone else experienced this ?
I'm not a fancifull type of personality, but this was strange and
compleatly unexpected.
14-5-05 3.0 hours.
I fitted the last 2 floor runners and then went to small local company specialising in resins
and glass fibre etc. I'm really lucky here, this company started up in about 1966 and
supplies most of the other sources in the U.K. I bought 1/2 gallon of resin and the
accelerator together with about 1/2 gallon by volume of filler powder and 50 metres of 2
inch wide tape. From anywhere else in the UK, this would have been around £30.00 + but here
I got it for £17.50. I don't know much about fibre glassing although I have used it
occasionally over the years.
On the up side, in her late 20's my wife was a co director of a fibreglass company
with lots of hands on experience, mostly in boats would you believe? Anyway I came home and
tilted the boat up on its bow having first duct taped the outside lower edge of the bow
transom to prevent the resin running out.
I mixed up a batch of resin and worked in 3 layers of fibre glass tape on the inside edges of the bow transom. I'd mixed up far too much so I painted the whole inside of the bow air box,
well its waterproof now. A few hours later when it had set I asked Dianne to have a look at
it. She said if you'd worked for me you'd need retraining, and laughed. It's strong and ugly,
but at least it won't be seen. I asked her to explain how to do it properly and was very
pleased with the results on the rest of chines, and edges. Not a bubble wrinkle or dry
spot anywhere. Like the man said, it's easy when you know how.
26-5-05 1.0 hour.
No work done for nearly 2 weeks, partly due to cutting off the top of my index finger in
the kitchen. Well when I say that I mean the pad on the end that has the fingerprint. Ouch!
Anyway the doctor taped it back on and it's healing well although I'll have an interesting
scar. Today I glassed the remaining hull edges and the next job is to do the same to the
stern inner air box. After that I'll use up the resin and tape to strengthen the floor runners
on the exterior of the hull.
List of jobs left to do on the hull.
Strengthen stern transom to take a Yulloh
Fit Access hatch to stern air box
Make rudder and adjustable rudder post
Make Dagger boards and casings
Make mast step
Fit Access hatch to bow air box
Sand and paint
28-5-05 2.0 hours.
Constructed and fitted the rudder post, effectively a channel with holes down the sides in
which pegs can be fitted through the rudder to adjust the rudder depth. I then strengthened
and glassed the inside of the stern transom and air box making it really strong and waterproof.
I'm on holiday in Scotland for 2 weeks soon so no work can be done for a while.
26-6-05 3.0 hours.
I started to measure out and cut the 1/2" ply for the dagger board casings and the dagger
boards themselves. I must say I hadn't been looking forwards to this. There were
approximately 30 running feet of cuts on dense ply, and due to the fact that both casings
and dagger boards are trapidozal in shape; they have to be done using a hand saw. I'm
no good at freehand cuts on power tools. It was a nice day and I simply decided to take it
easy and not stress out. Believe it or not, it took 3 hours by the time it was all cut out.
An 8' x 4' lump of 1/2" ply is difficult to manoeuvre on your own.
27-6-05 1.5 hours.
Marked out and drilled screw holes to fix the casing sides to the end spacers. I then glued
and screwed one side to both spacers on each casing and left to set.
28-6-05 1.0 hour.
I mixed up a quantity of fibreglass resin and painted it onto the insides of the dagger
board casings and then assembled them using screws, putting them aside to harden.
29-6-05 1.0 hour.
Planed the edges smooth on the dagger board casings and cut the rounded front lower corner on
the leading edge of the dagger boards, which I'll reinforce with fibreglass soon.
The actual time spent on the boat so far is 38 hours. Believe it or not, thats what I
predicted 2 years ago, for the construction of the bare hull not including painting etc.
2-7-05 2.0 hours.
Now came the part where I cut holes in the floor of the hull.
It's easy enough just put the dagger board casings on the hull floor and align
with the one foot square grid marked on both sides of the floor sheet before any cutting was
commenced. I used a DIY spec jig saw which made the job easy. Batons were fixed along the
bottom of the casings 8mm from the lower edge so that the casings protruded through the hull
a little, meaning I could plane and sand them flush with the hull. These were epoxied in
place sealing the slots and then screwed and epoxied to the bulkhead. It was all left to cure
for the rest of the day. It was hot and I knew a few cold beers had my name on them at the
local pub so it would have been rude not to oblige wouldn't it. I think half the fun of this
boating is the dreaming of sailing adventures over a cold beer anyway.
7-7-05 1.0 hour.
Another nice evening so I fitted the batons to both sides of the dagger board casings running
fore and aft 2 1/2 inches below the top of the casings. The casings will protrude above the
deck with a peg hole through them so the dagger boards can be adjusted for depth and to make
them easy to get grip on. All this was epoxied and left to set. Sods law, the ply I have left
won't complete the fore deck. What a bummer! Oh well another sheet of 6mm which will also be
enough to cut out sail batons as well, so thats ok. Again no work for the next week I'm
going to my holiday home in Scotland again. For those of you interested, the last time I was
there, I saw a submarine exercise going on in the Firth of Clyde (a submarine training ground
shown on the admiralty charts I have for the area). I saw 4 on the surface they were huge
the nearest being about 8 miles away you could even see the sonar dome on the bow with the naked eye. I was veiwing from about 300 feet above sea level and could see the furthest sub
at about 14 miles out.
24-7-05 3.0 hours.
Today was one of those grey warm heavy days, where everything is difficult and things seem
to take more effort than normal. I cut the three pieces of ply for the fore deck and fixed
to the batons attached to the dagger board casings and then glued and nailed in place. Once
this was done, I felt that because I'm going to cut a hole in the centre panel for an
access hatch, the 1/4 inch ply would not be strong enough to stand on. It's bound to
happen some time isn't it. I cut another panel of 1/2 inch ply and laminated it to that
section of the fore deck. I then epoxied the whole thing.
Now all I have to do is make the rudder, fit the mast step and I can start to sand and paint.
It's odd. I had expected to enjoy this stage but it seemed like a chore, the way we react to
weather is peculiar and I suspect it was a combination of tiredness and the thundery weather.
We have a huge low pressure area over the U.K. at the moment.
While I was on holiday recently I repainted some access steps to my mobile home in Scotland.
I used an exterior paint designed for rough untreated wood marketed (made?) by a company
called Cuprinol. It's a flat paint which fills and binds irregularities and is water based.
It dries to a tough plastic like feel filling the irregularities well. I'm going to use this
on the boat as it's easy to apply, and then over paint with an oil based paint of the colours
I want.
After a year or two I'll know how good it is, it's guaranteed for 5 years so it should be ok.
3-8-05 1.5 hours.
We've been having bad weather for weeks so nothing done. However today I made and fitted the
mast step and tried the mast blank. I'm using 3" x 2" 10' 00" length which I feel will be
sufficient for a Chinese lug sail, as the loads are distributed along the length of the mast
at the baton positions rather than acting from the top and subsequently with greater
leverage. I was rather pleased with the angle of forwards rake on the mast it was exactly
what I wanted. There are two reasons for this, first it means the centre of effort of the
sail moves forward and second it reduces the speed of the boom as it changes tack it also
means that the sail spills wind at the apex of the sail in a squall.
9-8-05 1 hour.
I've been very busy at work for the last few weeks so I've been too tired to do much to
the boat, hopefully that will ease off a bit now and I can get on with things. Today I
reinforced the hull where dagger board casings come through using fibreglass tape I also
glassed the 5 runners on the bottom of the hull. The next time I'll cut the holes for the
access hatches and fix them into the decks.
Soon I can start to sand and paint. I know it's unfashionable, but I want this to look like a
work boat. I've studied small fishing boats on the beach in the Costa Del Sol, Halkadiki in
Greece and also In Crete so the finish will be like them a bit rough and ready and I assume
the same is true for a real sampan. I think this will add to it's charm and be less
pretentious.
11-8-05 1.5 hours.
At lunchtime I bought 2 sixteen foot lengths of 3"x 2" one to make a thirteen foot mast
and one to use together with existing timber to make a car top rack/launching trolley. I had
cut off the bottom section of two 4 litre food containers to use as hatches in the little
decks. I used them as a pattern to mark circles on the decks and then cut them out using my
jig saw. Pushing in the lid sections I pined through the plastic, horizontally into the
plywood decks and then using a fine nozzle injected glue under the lip where it touches the
deck. The sealing lid is a really tight fit and I was surprised how easy the whole thing
was. Tomorow evening I will take photos of the boat to fill in the gaps in this log and
then on Saturday I can start the painting and finishing the hull.
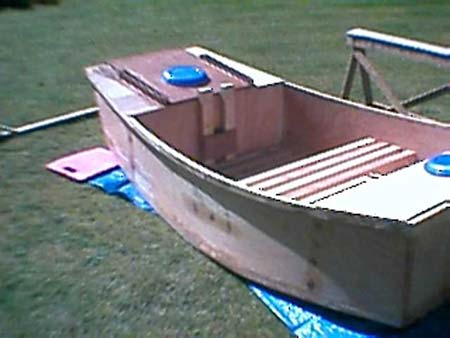
14-8-05 3 hours.
I took the photo's of the finished hull for this account and inserted them into the file to
add some interest, then at last I started to paint. I'm using a butter cream colour for the
main hull and will be painting the decks in non slip red floor paint. The next time I update
this account will prabably be after the maiden voayage although I may do one more to show the
sail and yulloh construction.
|