| Choosing a first boat building project
was for me a long struggle, weighing the cost, time,
difficulty and learning benefits of a particular design.
I wanted something small, to keep the cost down and
make it easier to store when I couldn’t work
on it. This was to be a learning experience not only
for myself, but also my son Cary, who was designing
a hull for his high school senior project, and we
wanted enough bending and structural elements to prepare
us for more involved designs. After studying many
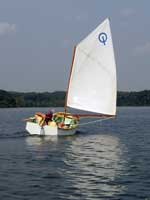
possibilities, I settled on Phil Bolger’s Nymph,
as found in Harold
(Dynamite) Payson’s classic book,
“Build
the New Instant Boats”. Plenty
of curves, taping and bending, just two sheets of
plywood and the book says you can build one in a few
days. He-he.
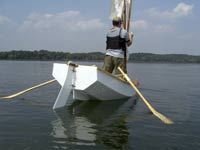 |
Talk about stable |
One year later, after a year of fitting in between
business trips and Cary’s project, which had
now turned into a full size hull, we finally got her
wet one hot July afternoon. Squeezing past the gasping
white fiberglass whales at the boat ramp and trying
not to get sucked into their prop wash, Cary and I
caught a slight breeze, or perhaps it was exhaust,
cast off and dropped the dagger board, which immediately
popped back up out of the trunk. Hmmm, wood floats.
Casually nudging it back into place with an elbow,
I made a mental note to rig a hold-down. Funny how
one modification leads to another? The design actually
calls for a lee board…
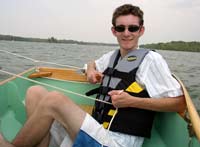 |
Cary at the
helm |
Handy turnaround formula for modifications
made by a rookie: Total additional days are equal
to number of changes multiplied by the number of
rookies, squared.
I had faithfully followed the author’s instruction,
lofting from the book, assembling the hull over bulkheads
on a couple of sawhorses and taping the seams with
poly-resin-wood-butter. At that point, most likely
under the influence of resin fumes, I decided to start
customizing, which is probably not advisable for first-timers.
Any sane person would wait until their second project.
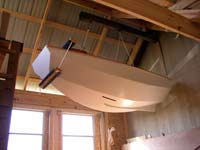
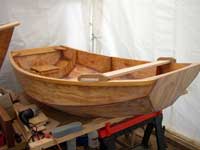 |
Under construction |
The first change was to quit using that smelly fast-setting
resin which was a bear to sand, and switch to a medium
setting marine epoxy, after reading John Harris’
construction notes on the CLC
site. I wasn’t in that much of
a hurry, and the thought of getting the fast kicking
resin down smooth on the cloth had me worried. In
the summer heat, it tended to boil and clump up like
instant grits. I never did get the inside seams smooth,
so now I just call them “non-skid”.
Helpful tip for cooking grits (not instant):
just when grits are about done, quickly stir in
a couple of scrambled eggs. Keep stirring as they
cook into the grits. They’ll fluff up like
a soufflé and have more flavor. Cheese is
good on them too, but back to the boat…
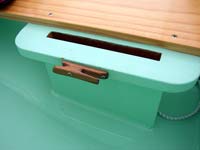 |
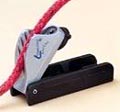
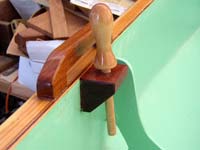
The new daggerboard
case (the cleat was an afterthought) |
Another change was adding a dagger board case at
the edge of the lengthwise seat, sort of like a holster.
The case is epoxy sealed maranti and goes through
the hull, flush to the bottom (I trusted the sealed
marine ply edge much more than the AC plywood). In
this off-center location, any water that burps up
through the case doesn’t get under your shorts
while rowing. The hull and the case top act as a clamp
to give the case strength.
About this time in the project, I answered an ad
in the Duckworks
Classified for an Opti Pram sailing rig,
and met ‘Captain’
Ron Thweatt, who also treated me to a
box full of teak and mahogany scraps, which have since
turned into pads, handles, cleats, mini half-hulls,
oar-tips and various what-nots. Some of these have
made their way onto the boat, most evident adjacent
to the mast “thwart” in the bow…
 |
Captain Ron
on a run |
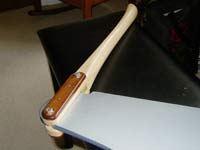
The original design called for a permanent piece
here, but it blocked the bow area, where someone might
want to kick back after rowing. Studying the problem
and the scrap pile, I cut two mahogany blocks, glued
and screwed to the sides, two teak “handles”
screwed from beneath the rails for lateral and vertical
strength, and bought some belaying pins to hold the
thwart snug after sliding it into place. When not
sailing, the pins make a great tie-off point, and
can also be used at the stern knees.
 |
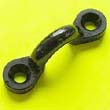
Thwart block
and pin |
The plan called for a leg-o-mutton sail, which would
keep the sprit above your head, but the Optimist rig
has a boom. For this reason, I decided to cut out
the 2nd section of the seat so I could stretch out
in the wide bottom of the boat and not loose my hat
when coming about.
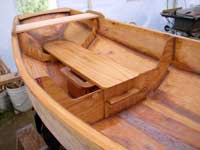 |
Changes to seat |
Serious note: As the seat
I removed is part of the structure, I lengthened
the yellow pine skeg to about even with the front
of the dagger board case, forming a keel which bridges
¾ of the bottom and two bulkheads. I wouldn’t
recommend changing the structure without adding
reinforcement.
 |
View of extended
skeg |
The plywood rudder was part of another trade with
my good friend Captain Ron, who inspired me further
by showing me his Nutshell Pram tiller, which just
hooks onto the rudder, so I looked through some 2x2
spruce sticks, found the only 2 feet of clear grain
and shaped a tiller using a curved rasp, glued and
screwed with SS fasteners, teak scrap and some reshaped
brass elbow brackets to prevent wood-to-wood wear.
Not quite Joel White quality, but pretty nice for
a dinghy.
 |
Nymph tiller |
One afterthought I’m happy with was to cut
a slot just under the seat that the dagger board slides
into. The rudder can stow on top of it. If you slide
it out a few inches, it makes a dandy “galley”
for a thermos of coffee and a Moon Pie.
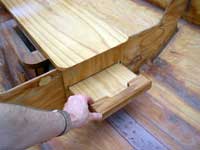 |
The daggerboard
case |
Moon Pie Etiquette: If after noon, Moon Pies
are generally served with RC Cola.
The oars were made from two nicely cured 8 ft. 2x6’s
from Home Depot. Sorry, I got the only 2 clear ones.
Loosely following an old David Shaw article in Wooden
Boat, I shaped the oars using a table saw to eight-side
the handles, then a Japanese pull saw, the curved
rasp and a chisel to shape the loom. A band saw would
have made it all much easier. Teak tips were added
to get just a bit more curve and strength. The back
of the spoon blades are glassed to keep the pine from
checking. The brown paint covers a stray saw cut,
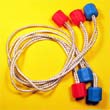
but looks almost planned. The rope ‘leathers’
are epoxied, then varnished along with the rest of
the oar (if you do this, take a course sponge sander
to the ropes; this gives them a soft velvety surface
so they won’t scratch the rail). The grips are
unfinished and rubbed down with Brilliantine, a mineral
oil hair tonic which smells like lavender. The 2x6’s
were less than the rope at $3.50 each.
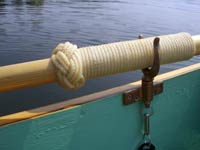 |
Rope 'leathers' |
There were a couple of other changes to the stem
and stern rails to help continue the visual curves
around the ends. I used 4 coats of Behr exterior latex
which actually took two weeks to fully cure without
scratching off, 5 coats of thinned Epifanes marine
varnish on the wood, then added the oarlocks and bought
PFDs. My only regret is not spending a few more dollars
on marine plywood for such a nice design. In my opinion,
the lower price isn’t worth the time and effort
spent filling and sanding voids in the AC Plywood,
not to mention the extra weight of fir.
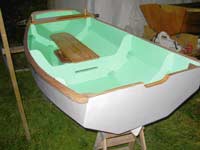 |
Wet paint |
Our first trial sail was more than we hoped for.
Heat, rain, waves, calm; we experienced them all,
taking turns at the tiller and oars. Nymph moved well
under sail, the fat little hull sticking to the water
like it was attached. She also will fit neatly in
the bed of a small pickup with the tailgate down.
Nymph is fun to build and sail, well worth the effort
and the small cash outlay, and will definitely prepare
you for a larger project. Now to find a nice cove
to put into where there are no whales about…
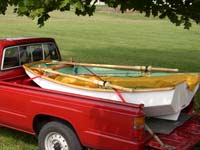 |
After studying
many possibilities, I settled on Phil Bolger’s
Nymph
(click to
enlarge) |
My use of the words “gasping white fiberglass
whales” is a reference to over-built, over-powered,
plastic noise-producing behemoths that leave films
of fuel, exhaust and 4 foot seas behind them. My
apologies to those quiet and beautiful mammals of
the oceans.
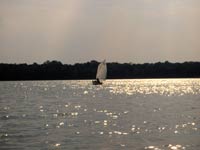 |
Sunset breeze |

More by Stacy Smith
|