|
I wasn’t sure whether to include this article, as it is not strictly boat-related. But the more I thought about it, the more important it seemed. For one thing, a flashlight is the minimum legal requirement for navigation lights. For another, it is the last ditch method of getting the attention of the idiot speeding toward you at full plane in his 800 hp gun palace. In either case, the more powerful the better. Furthermore, the methods I’m about to describe might be useable in beefing up the output of some actual navigation lights, depending on what lap they use.
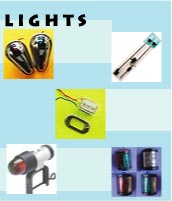
Really bright flashlights
Most of us probably use a small LED head lamp, and maybe a big flashlight that takes 6v lantern batteries as a spotlight. These are rather big and clunky, and I had been wishing for something more compact. There are, of course, some really bright and compact flashlights out there already. However they tend to also be really expensive. Like a couple hundred dollars expensive! The reason is that they are considered “tactical” flashlights for police and military use – they have enough power to temporarily blind whoever they are pointed at, and they have the seals and shock absorption to be immersed or used as a club and keep on working.
The inspiration for this article is a like-minded fellow on instructables (username “dchall8”, former engineer in the USAF – sorry I don’t know the fellow’s name!) who adapted a cheap flashlight to be more powerful. See https://www.instructables.com/id/Make-a-$200-%22tactical%22-flashlight-for-about-$15/. He brings up some great points – besides being cheaper, it is also incognito. Nobody will steal an $8 flashlight as quick as they’ll steal a $150 flashlight. And if they did, you won’t feel as bad about it. Besides, you know how I am with things like this…GPS overboard…
Our friend at instructables achieves wonderful results for a reasonable price by using CR123 photo flash batteries, but even this was too expensive for me. These cells are around $8 each locally. They are cheaper when ordered online, but then there is shipping to contend with, and I don’t know about you, but I hate the idea of having to order a consumable like flashlight batteries online.
So I set out to make this work with common AA batteries.
Here’s what you need:
-
RayOVac "Industrial" flashlight
-
KPR118, 7.2-volt, incandescent, flashlight bulbs (get at least 2)
-
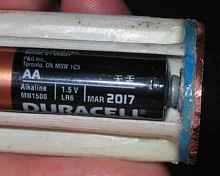
6 AA batteries
-
Brass or copper shim stock, maybe 3/32”-1/8” thick
-
6-32 screws
-
6-32 tap (could probably just use self-tapping screws)
-
½” PVC pipe
-
Plastic electrical box
-
PVC cement
-
Small springs, about ¾” long by 3/8” wide
Let’s get to it.
Battery Holder
Changing a bulb is easy. The hard part is the battery holder. We need 6 AA batteries in series – this means two up, two down, two up. (Or vice-versa – an incandescent lightbulb doesn’t care what direction the electrons are moving.) But we do need to keep the batteries properly oriented without shorting them.
My first attempt involved 1” PVC pipe and trying to get the batteries to stay where I wanted them to be. While 1” PVC matches the size of a D battery quite nicely, it is a lot harder to come up with a way to index the internal contacts to the batteries. I decided each battery needed its own channel. Enter the ½” PVC.
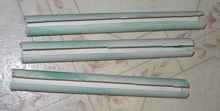
This pipe is actually too wide, so the first order of business is to make is a bit smaller. I ran the pipe through the tablesaw twice to take out a kerf about 7mm wide, then cut some pieces to length (around 6” long, which is oversized – we’ll trim later).
Then we close up the kerfs. This involves immersing the plastic in boiling water to soften it – the rubber spatula is just to provide a handle to avoid burning myself (as much).
Here they are after closing the kerfs. Be sure to drop a AA battery through each one to be sure you didn’t make them too tight. I had to adjust one.
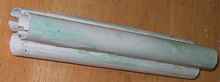
I then belt-sanded some flat spots on the tubes and glued them together with PVC cement. It is handy to clamp them in a vice while curing. Be sure they cure fully before the next steps.
As the triple tube stands, it would work fine…if it would fit. It’s a bit big, however, so we need to trim the diameter. I sawed away some excess, then belt sanded again.
See the little channel a filed between two chambers? We’ll need that for the…
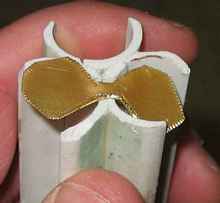
Inner Contacts
Now we need to make the inner contacts. Remember how our batteries need to g otwo up, two down, two up? These contacts are the ones that “turn the corner”, switching from up to down, then down to up without touching the outer contacts.
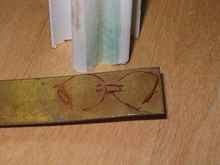
The first step is to trace the two adjacent chambers and the position of the filed channel onto shim stock. Then cut it out. I used tin snips.
Here’s how it fits.
We’ll want to file that a bit.
The inner contact is held in place by the plastic endpiece, which is just a disc of PVC cut from a plastic electrical box.
This is glued in place with PVC cement as well, but you’ll want to dry fit the outer contacts first (the copper piece above).
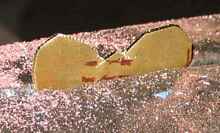
Outer contacts
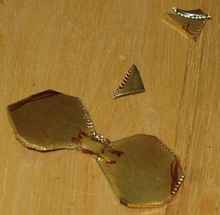
My outer contacts were cut from 3/32” copper sheet simply because I had some. I think thick brass shim stock would work fine.
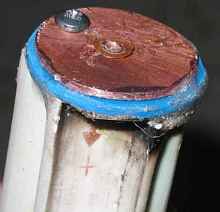
On one end I tapped the outer contact and ran a screw and washer from the inside. On the other end I drilled and tapped a piece of ½” brass rod.
Honestly both of these are probably overkill. I bet a screw, washer and nut would be fine with some threadlocker, cutting the screw off and filing it flush. Here’s the whole assembly before gluing the second end on.
You do need to glue the second end on, or it will fall apart on you when you try to put it in the flashlight body.
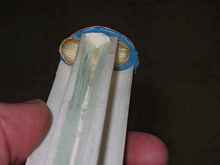
Do you smell something?
One mistake that is easy to make with this setup is shorting two or more of the batteries. This can produce dramatic results. In my case I realized right away that the flashlight was getting much too hot, but it took me a little banging on the case to remove the battery pack. In the meantime, one of the springs had turned into a filament and blackened some of the innards.
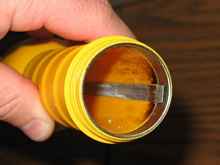
The problem is the exposed strip of metal that connects the bottom end of the battery pack to the switch. It is easy to short to this.
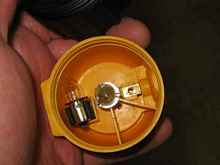
To remedy this, I filed down the inner contacts to keep them away from the edges, and filed the top contact smaller than the plastic end.
Then when inserting I make sure that contact strip does not line up with a battery.
Results
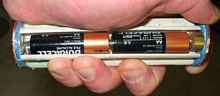
Well, it’s brighter! Here is a shot of an unmodified light of the same model next to the one with the new battery pack and bulb.
Sitting at my computer, this light now shoots through the window and across the street with ease, where before I’d be lucky to see anything outside with it. I think it will get someone’s attention on the water when needed.
By the way, do get more than one bulb. With this project, we are running the KPR118 beyond its rated voltage. This makes it very bright, but it will burn out faster too. Fortunately, Rayovac was kind enough to include a spare bulb clip in this flashlight.
Happy bright-lighting, and do let me know if you apply similar mods to your bicolor navigation lights.
Rob Rohde-Szudy
*****

|