 Custom Search
|
|
| sails |
| plans |
| epoxy |
| rope/line |
| hardware |
| canoe/Kayak |
| sailmaking |
| materials |
| models |
| media |
| tools |
| gear |
 |
 |
| join |
| home |
| indexes |
| classifieds |
| calendar |
| archives |
| about |
| links |
| Join Duckworks Get free newsletter Comment on articles CLICK HERE |
|
|
| Harley 8+ |
by Stephen Ahern - Starksboro, Vermont - USA |
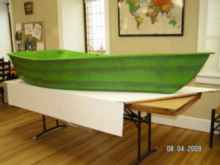
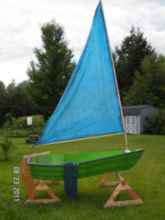
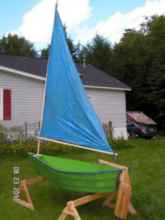
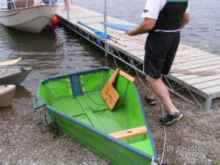
This boat was built as a “prop” for a week long performance at the Bristol Baptist Church. They needed a boat for a “swamp” themed VBS… This seemed to fill the bill.
Materials: 1 sheet (+1/8 sheet) 5.2mm Luan Underlayment (made with waterproof glue), PL Premium, stitch–n-glue construction (using copper wire), water based latex paint white primer, and a second coat in “swamp-slime-green” - my own blend.
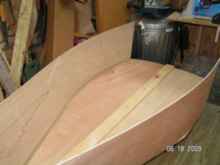
The plans are named “Harley 8 the ULTIMATE One-Sheet of Plywood Sailboat” and I don’t disagree, but I didn’t have the one by twelve piece of wood needed to build the transom so I used a 1’X4’ piece of leftover ply from another project (hence the “+”). The first line in the plan is: “Sailing is for Everybody with the “Harley 8” the ULTIMATE “One Sheet” of plywood Sailing Craft!” This boat is 8 foot long, 46 inches wide and 13 inches high, from one sheet of plywood, impossible? NO! It all depends on how you layout and cut the plywood. The plans are hand-printed (meaning they are written by hand using print letters, as opposed to script letters) by: Kristofer J. “Harley” Harlson. The detailed drawings are also hand made. Marking the lines on the plywood is simple and the step by step directions were made for a “First-Time Boat Builder”. This was my “second” boat, and I still needed the step by step plans, LOL… The plans even tell how to make the curved lines using a yard stick as a “batten”. I cut out the plywood using a jig-saw and a circular saw. Draw out the first piece, cut it out, flip over, then trace and cut the next piece. OK, now you have the sides. The same goes for the bottom: draw, cut, flip, trace, and cut… done! As it says in the plans: “Yeah Baby! You Rock!”
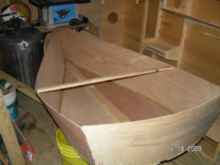
The next of the plans explain how to make the holes for the wire to hold the panels together, and how to cut the transom out of a one by twelve. Score it to assume the curve needed to complete the boat. I just used an extra 1/8 plywood to make the transom and then added a 1 by 6 board inside to beef it up for hold the rudder.
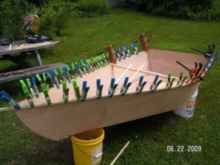
The plans also call for using fiberglass drywall seam tape with PL Premium to hold the tape. Don’t forget this part, or the boat will leak… How do I know this? There is need of a temporary brace to hold the boat sides out to a width of 46”, I used a 1X1 46 inches long. Then you attach a simple frame made with 4, 1”X2” boards and triangle plywood pieces. Add the rub rails and at this point your Harley 8 has a hull. Now come the “sailing” bits and pieces: rudder, leeboard, mast steps, mast, boom, sail, rigging, painting and sailing instructions. They are all covered in detail in the 84 pages of the plans. Oh did I mention that these plans are FREE?
However there is NO flotation built into this boat plan. The reality of this will become apparent… It is time for the test; two years have gone by since the finished the hull. I had to look for the materials to complete the mast, boom and rudder. The mast was a rounded 2X2, the boom was a 1X2, the rudder was built from two pieces of cedar I found, and the sail was cut from a 6X8 foot polytarp. The boat was a great prop for the VBS week. Two years later we have the sailboat, as designed by the plans (with the exceptions noted above).
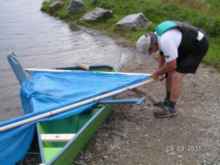
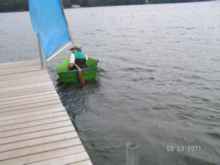
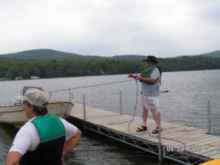
I took it out for a test float on Lake Iroquois, in Williston, VT, it leaked (remember the tape?); but, not too bad. The line in the water is tied to the dock and my wife was ready to pull me to safety if necessary. So I put on the sail and took it out for a test. I had difficulty positioning myself to handle the tiller, and I tried to sail facing forward, with my arm twisted to the back…
I was sitting too far back against the transom and on the lee-side when the wind picked up and pushed me sideways. The boat took on water and it gracefully sank!
Boy-O-Boy was that FUN! Did I tell you the plan doesn’t account for needed flotation? I was laughing my fool head off, as I was swimming back to shore. My wife (bless her heart) was on the dock worried sick that she couldn’t come and get me… however there were three kayakers just getting ready to start on their own adventure, and they were most gracious to save my bacon! If my three angels of mercy are reading this article I just want to say, “THANK YOU AGAIN for your help!”
The boat was pulled back to shore and along with the mast/boom/sail, paddle, and extra PFD. YES! I was wearing my PFD. Doesn’t everyone who ventures out in a boat? Safety is always a top priority when boating on the water. The boat was fine, still a little wet (and so was I) but we held together.
So in conclusion to this adventure; my wife made me promise to make this into a “rowboat” (I will), and stick to bigger sailboats. My bigger boat is an OZ Racer (formerly PDRacer #310). IF you decide to build the Harley 8; add flotation: air tanks in the front, back and sides. Would I build this again? Not for a sailboat; Yes, for a lightweight rowboat. IT is truly a one sheet wonder; and, I salute Kristofer J. “Harley” Harlson and his vision that made this one sheet plywood sailboat, which will work for true sailor’s everywhere. Some people feel that smaller the boat, the better a sailor you should be. I agree! Plans came from “Shorty” Routh… Shorty@ShortyPen.com |
 |
