
 Custom Search
|
| sails |
| plans |
| epoxy |
| rope/line |
| hardware |
| canoe/kayak |
| sailmaking |
| materials |
| models |
| media |
| tools |
| gear |


| join |
| home |
| indexes |
| classifieds |
| calendar |
| archives |
| about |
| links |
| Join Duckworks Get free newsletter CLICK HERE |
|
|
| Mike's Maritime Meanderings |
by Mike Machnicki
- London - England The Cardboard Engine |
 click for bio |
Whenever I meet up with friends they ask how the boat build is going, the last time I casually mentioned that I was considering building a cardboard engine, my wife didn’t bat an eyelid at this, as she is used to seeing all manner of projects and ideas going past. But our friend protested at the suggestion, maintaining that firstly I “could not build and engine out of cardboard” and secondly as I had “only just got my frames, keel, and chines set up this was surely too soon for the engine”.
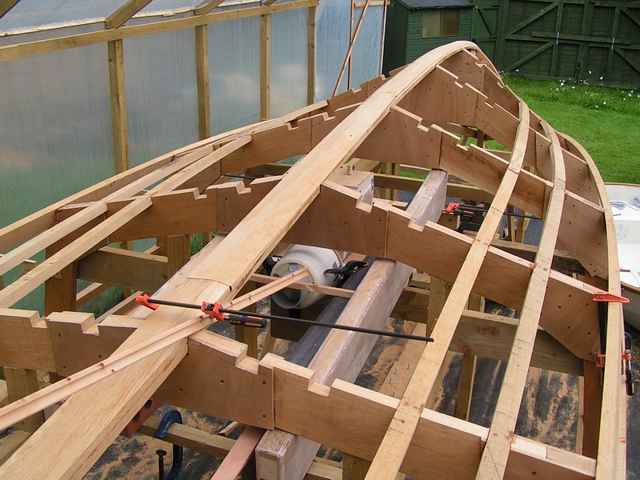
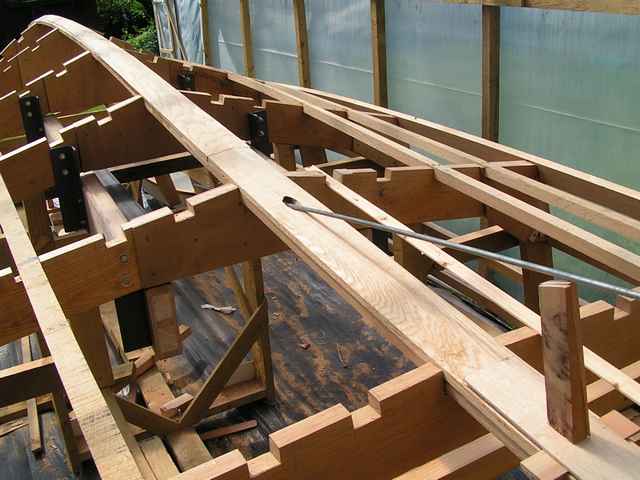
The build is going well but not particularly fast. I try to think well ahead and have decided that the prop shaft is going to be a big problem. The difficulty is that I need to get a 1.25” x 6’ prop shaft through 3.5” deadwood 2 foot thick, and also position several sets of bolts either side with exact precision through the frames. I don’t think that I can manage this once the skeg is built and attached so it will have to be drilled plank by plank, when I come to that part. The problem is that once you have drilled at the wrong angle and gone through the side of the skeg, or into the prop shaft tunnel, it is difficult to correct the hole, even if it is a simple job to patch the mistake with epoxy resin – not to mention the difficulty and cost of getting/making a 60” long drill. In order to make this an easy process I will need to make and place the engine stringers and beds in position before the bottom battens go on. I would prefer to do this job when the hull is turned over but that will cause difficulties in fabricating the skeg, and of the two jobs I know which one I would rather do upside down.
The first job is to make the stringers, 2” thick 8” high and 6’ long, backed by ½” plywood and covered in fibreglass and painted. There is an option of either using a solid piece of wood or laminating in strips, it is more work to laminate but will probably be a better job as it will be more stable due to the fact that it seems to be random whether I get regular or quarter sawn timber.
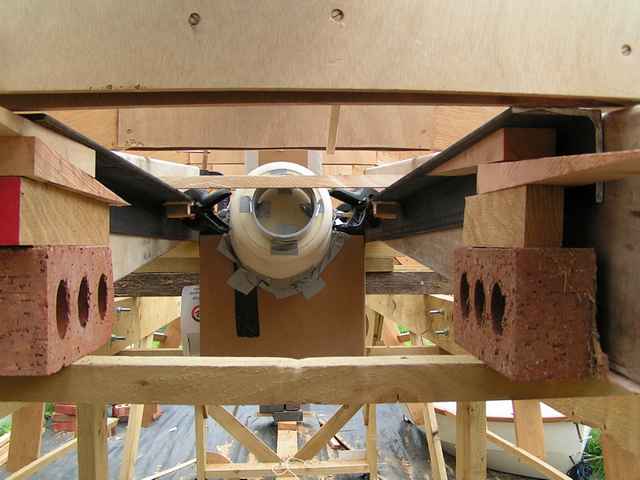
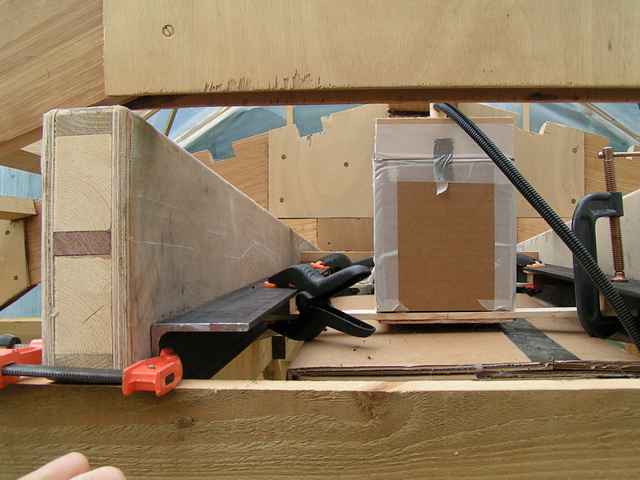
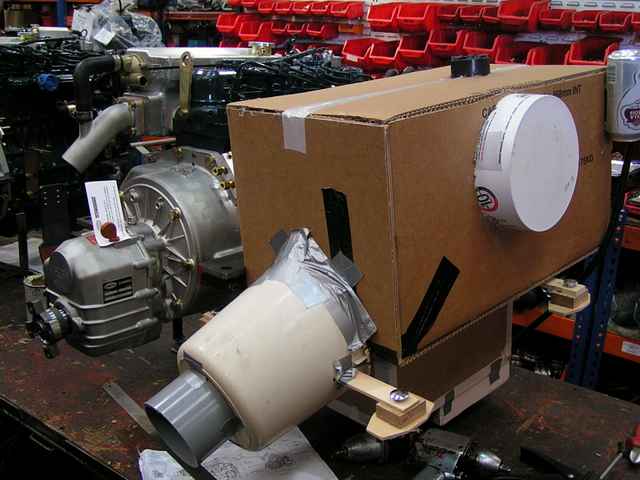
With the stringers made I need to place the engine beds and fasten this all to the hull. I did want to make the ironwork in A4 stainless but price intervened as mild steel, de-scaled and hot dip galvanised was about ½ of the price I would have paid for ss. Placing the stringers is not easy as a couple of frame supports are interfering, and these can’t be removed until I have a few side and bottom battens in place to hold the frames rigid Next comes the dummy engine. I need to know where and how the engine will fit before committing myself by cutting the hull and frames, so it seems prudent to mock up a full size model and work to that. It is made from odd scraps that are available with a piece of wood for the prop shaft. No point in buying the engine up front and having it sit and wait for two years, so I took the model to Beta Marine and compared it for fit against the real item.
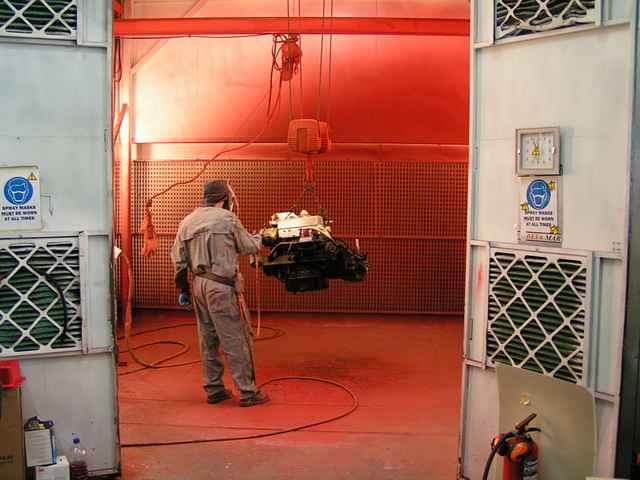
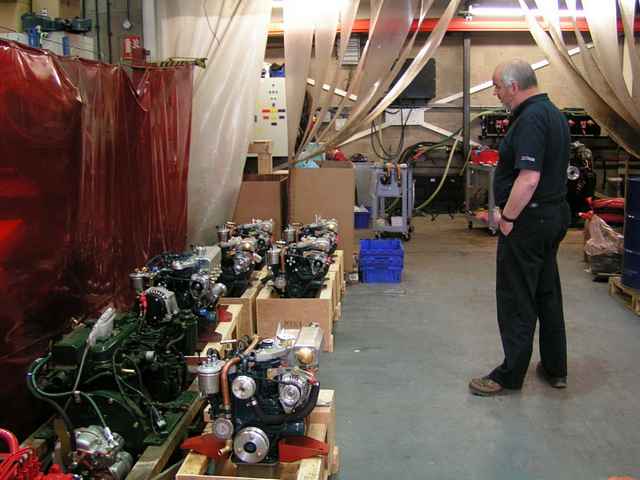
Beta Marine were very helpful! I asked Andrew Winton, of their sales team “Why did you chose Kubota engines to marinise?” “You don’t supply from stock then?” I asked “So, do you have much contact with Kubota?”
I left the factory with an installation manual describing every aspect of fitting the engine and a great respect for the excellent job these people were doing, hardly surprising that they were proud of their product.
It’s a good job I had the manual as I was intending to go for the shallow sump option, but after checking the oil change intervals, had a rapid change of mind. The normal oil change was every 250 hours, but with the shallow sump this was reduced to every 150 hours, quite a big difference, you would have to be desperate for the reduced profile to take a big hit like that if you used the boat regularly. Life is never easy and can be downright scary once you stray from the set of carefully drawn building plans. I didn’t want to leave too much spare space under the engine because this would cause the wheelhouse to be that amount taller for the same interior height, or to keep the exterior height (read windage) down I would need to sacrifice headroom. As it turned out by adjusting the beds on the stringers to the maximum extent I have 4 inches spare under the engine for a drip tray. This solution will allow space above the engine for the insulation. Now comes that scary part I mentioned, committing myself and drilling a hole through the frame and keel. They say its best to measure twice and cut once, well I lost count of the number of times I measured. Having assured myself that the required parts would fit I was temped to leave the filling of the stringers and beds till later, when I may make some further adjustments, but the stringers cannot be moved and are in the only position they will fit, the beds are at the maximum adjustment, so why wait, a little bit of commitment is the only ingredient missing!
With half the job done and the keel hole located building the skeg should prove to be a lot simpler. When the time comes to fabricate it I will write an article on making the prop shaft tube and fitting it all together. ***** Click HERE for a list of articles by Mike Machnicki
|
|