 Custom Search
|
| sails |
| plans |
| epoxy |
| rope/line |
| hardware |
| canoe/kayak |
| sailmaking |
| materials |
| models |
| media |
| tools |
| gear |
| join |
| home |
| indexes |
| classifieds |
| calendar |
| archives |
| about |
| links |
| Join Duckworks Get free newsletter CLICK HERE |
|
|
| Mike's Maritime Meanderings |
by Mike Machnicki
- London - England Building an Aluminium Trailer - Part Five |
 click for bio |
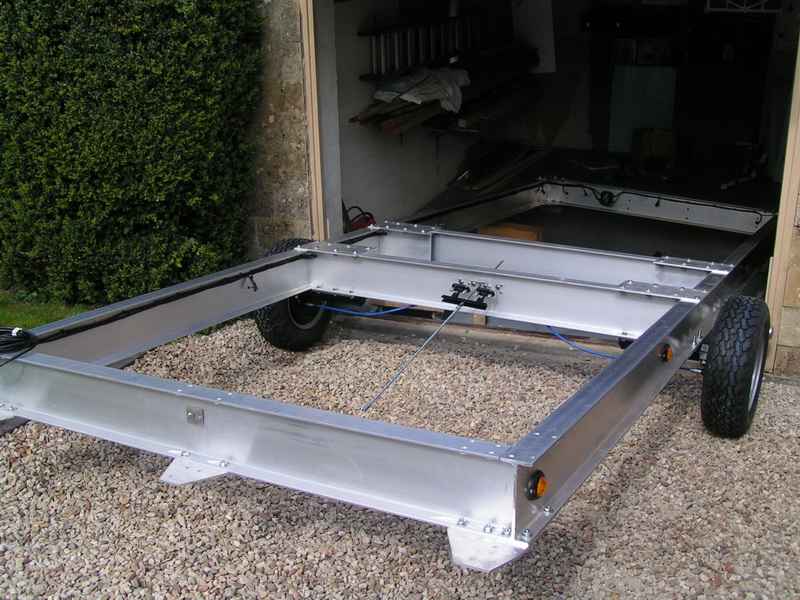
Part 4 of 4 - Finishing OffPart One - Part Two - Part Three - Part Four - Part Five In previous articles we have developed the design and completed the basic structural framework of the trailer, now in this concluding part of the saga it is time to explore the finishing components and the options for attaching them. Compared to the boat, with its myriad systems and components, the trailer is very simple. But even a simple system can be complicated to assemble in such a way to make it robust and durable. As we have seen from bolting the trailer structure together just a simple nut and bolt, is not just a simple nut and bolt:
Some of you may think that I am over designing the thing, but if you want it to have a long and trouble free life, these things have to be taken into account! SuspensionAttaching the suspension units proved to be relatively straightforward, just remove the temporary plywood plates and bolt the units on. I decided to take Autow’s advice and replace the normal bearing packing with waterproof grease, this was a good introduction to maintenance, as I suspect that I will be taking them apart frequently to clean and prevent wear due to salt water ingress. I did ask about pressurised greasers but they were not available to fit these units. Isolating the steel fitting plates from the aluminium trailer proved to be easy. Sandpaper the bolt plate to remove factory paint and provide a shiny surface for the epoxy, three coats of epoxy, wet on wet, and a coat of paint to protect the epoxy from UV. There is a minute amount of play in the bolts so I checked the alignment as best I could with a 7’ straight edge on the side of each unit before tightening the bolts. Just a word here on the final balance, because the boat centre of gravity is as yet a guestimate, I have left the four bolts (two on the top and two on the bottom) on each end of each side rail, as BPZ Nylocs, to allow me to adjust the placement of the units should I need to alter the nose weight of the trailer. This may involve a little bit of re-wiring and maybe moving some of the side lights, but should not be too onerous a task. The tyres are what used to be sold as “Avon 950”, though Avon no longer make them, they are 185 x 70 on a 13” rim 87psi and rated axel load 1900kg or 1800kg at 81mph. I only bought 4 for the moment as the trailer will not be on the road until the boat is completed, at least 18 months optimistically. Time enough to buy a spare wheel, a couple of sets of bearings, and any other bits likely to be needed. When I designed the trailer I allowed 9” per side for the wheels, in retrospect this was not enough, to the extent that even with the wheels off the hubs are still a bit too wide to fit through the garage door frame. This is where we need a little creative thinking. Several options were suggested by friends, each of which I recon would just about 90% do the job. I liked the idea of lifting one side of the trailer and taking it out diagonally, but unfortunately I didn’t have 4 solidly built friends to hand. I didn’t like the thought of having to take the door frame out. Eventually I reckoned that with two diagonal tyres off I could just about get it through the door by swapping tyres back on and forth. It worked after a struggle, the trailer also acquired a bit of colour, beige from the door frame and red from me, but the job was done.
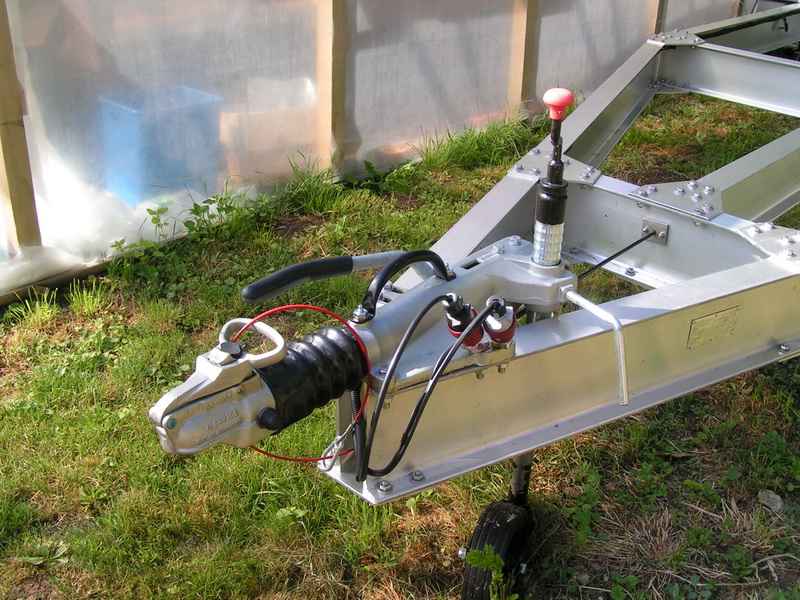
CouplingNot much to say here, it comes as a finished component ready to be bolted to the trailer, it is a heavily galvanised casting, only needing 6 bolts to attach it, complete with a security lock to hold the coupling closed. I have coated the underside with three coats epoxy where sits on the aluminium I beams and hope that this will also prevent hidden corrosion making the trailer look the worse for wear after a few years.
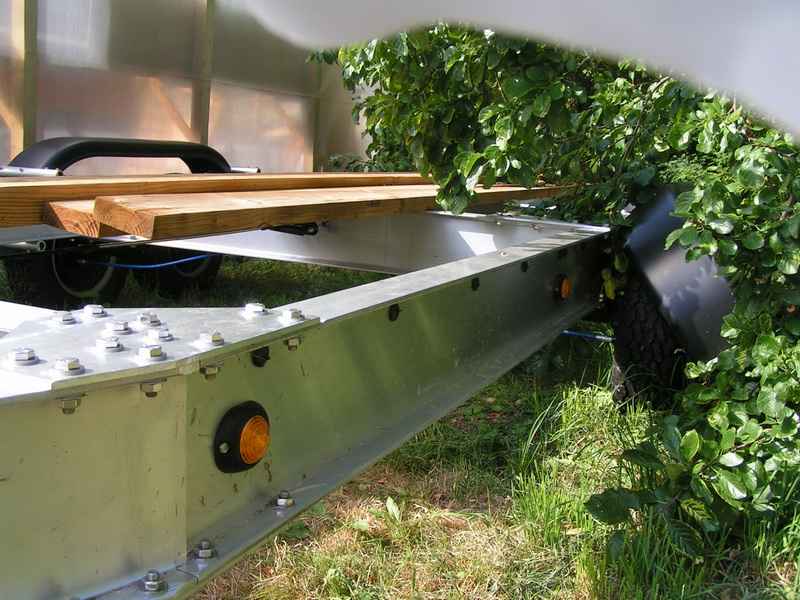
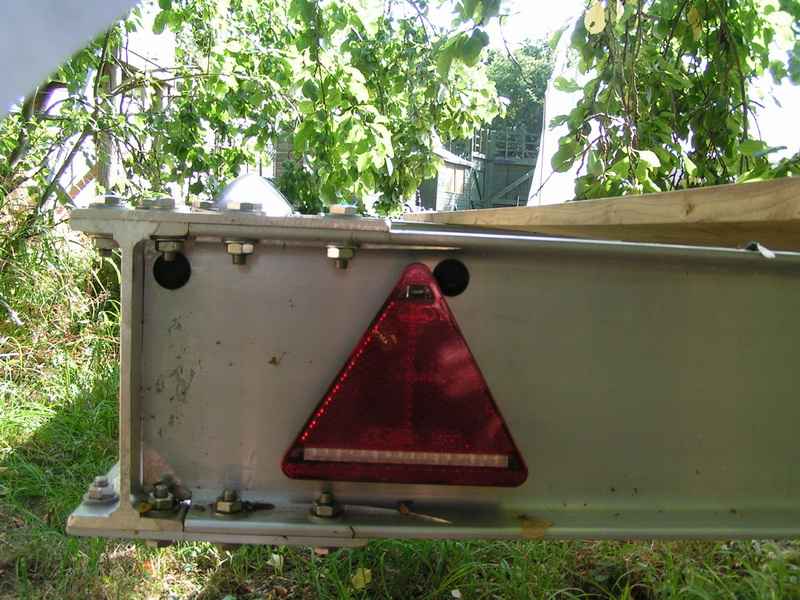
LightsOf all the parts and processes this was the one that gave me most concern. All the units I found on the internet had one thing in common, they were not rated as waterproof. Its one thing to drive in a rain storm, but entirely a different story to immerse the trailer in 4 foot of salt water for 10-15 minutes. In the end I chose to have the minimum number of connections and bought two triangular tail lights which incorporated all the required lighting in the single encapsulated units. Even though it was totally enclosed I was still not sure that it was 100% waterproof to the degree required. Looking at the sidelights, which again were encapsulated LED units I noticed that they were made from two plastic mouldings glued together. Where the joint was, there did not seem to be sufficient glue to make a full watertight joint, only adequate to hold the parts together. The only solution was to run some epoxy round at this point to make a complete seal. The number plate lights were even worse and needed the same treatment to bring them up to the standard I would ask of them. Whether or not they do the job, we will have to wait and see. There seemed to be some confusion between the people I asked whether the trailer needed a reversing light. The VOSA IVA testing manual for category O2 trailers suggested it needed at least one, so I checked with NTTA who confirmed this. This is a pain as I now need to attach another plug to connect to the car’s auxiliary electrical connector for just for a single wire. NOTE: at this point I had better mention that the trailer will need to be vehicle type approved due to new European Union laws, it will cost about £70 and I will need to book an appointment at a specialist testing centre but will probably defer this until I need to take it onto the road.
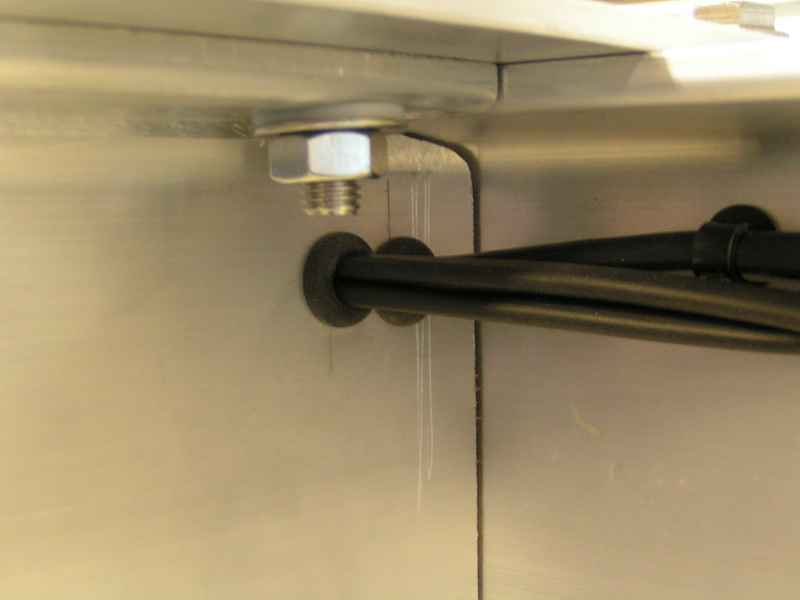
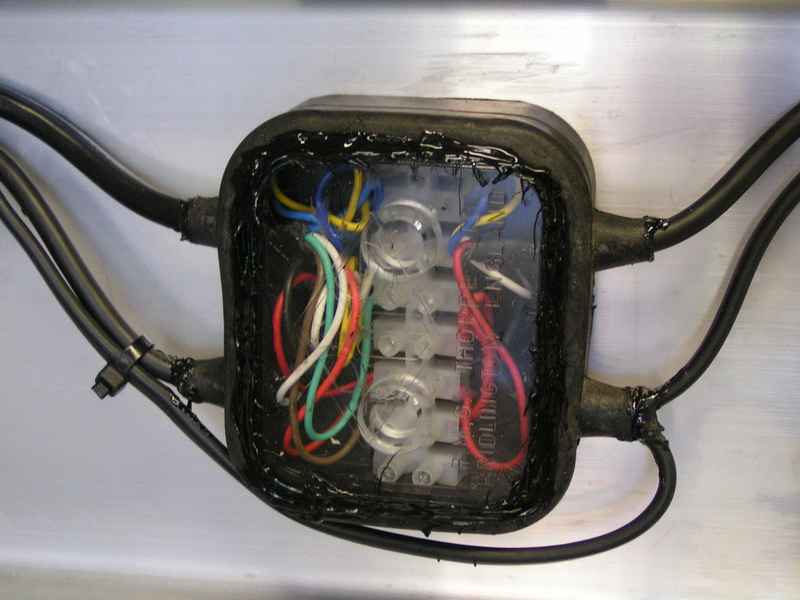
Electric ConnectionsThis section we can split into a several of components. Firstly the connection to the car, not much I could do here as the connector was not fully waterproof and anyway it would not be immersed in water, would it? So just connect it and forget it. I did put some sheathing round the cable where it could rub on the front of the trailer frame, and filed the sharp edges smooth. Next we have the main connections at the back of the trailer, for this I bought a standard rubber connection box. The connection bolts are galvanised so I coated them with Plastidip in an attempt to waterproof them. The cover plate is transparent and fitted into a rubber channel, so more Plastidip and a sachet of silica gel inside to absorb any moisture. At least I can keep an eye on it to check that all is OK. It was suggested to me that the wiring should be run inside plastic tube but I rejected this idea for two reasons, firstly water can lie in the tubes and deteriorate the insulation, secondly it is always best to have things exposed, in my opinion, so they can be inspected and easily replaced, should the need arise.
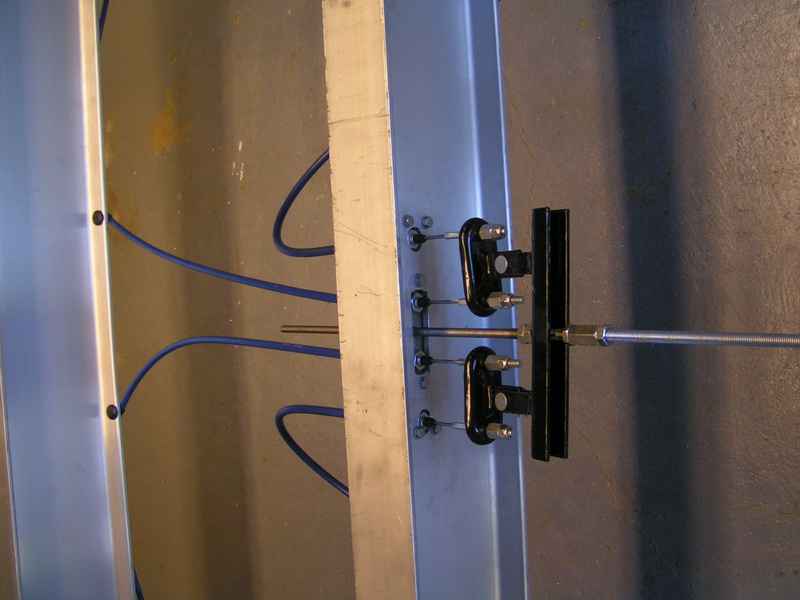
Note: If you try this at home don’t use silicon as it will corrode the surface of zinc, copper and ferrous metals due to the acetic acid used to cure it. Aluminium is OK where it will etch the surface and form a stronger bond. According to the regulations side lights are not required for boat trailers, but I think it is safer to have them when driving at night. The daisy-chained wire connections I figured would be OK as these would be totally under my control. First twist the wires together, having left sufficient spare to remake the joint at a later date should the need arise. Next a dab of solder to hold the joint secure and prevent the copper tarnishing. Place plastic shrink wrap round the joint and seal it completely with hot melt glue at the ends. Dip the joint into Plastidip – this encapsulates it in a tough rubber coating. BrakesNot much choice with the brakes as they were already supplied fitted to the suspension units. In the UK we only have drum brakes on trailers, non of the American hydraulic brakes or disk brakes, I guess this is OK as out trailers are limited to 3.5 tons, anything larger would have to be towed by a truck and then would have air brakes.
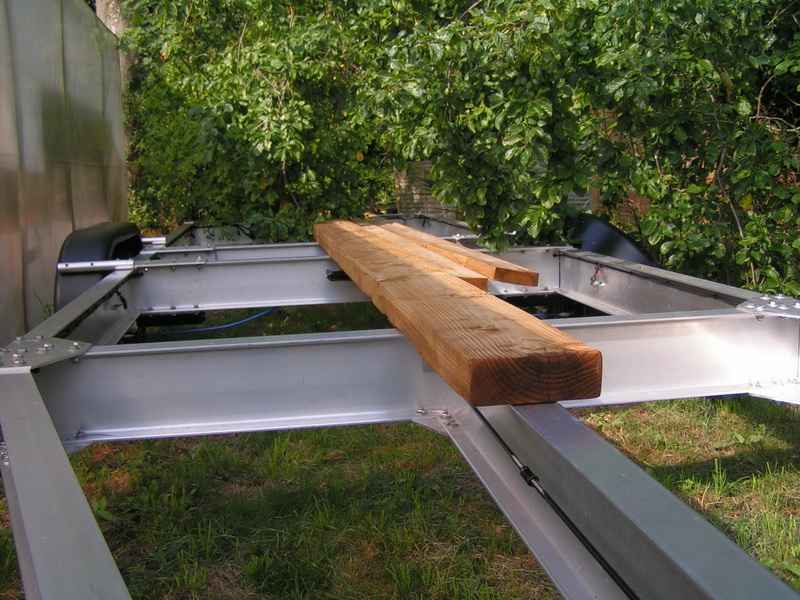
The system is essentially a simple one where a long metal rod from the tow hitch is used to pull Bowden cables braced against the frame of the trailer. The Bowden cables I chose were stainless steel, though probably not A4 (316 grade), more likely A2 (304 grade). As with everything you are OK if you stick to the well-trodden path, these units are designed to fit on a 6mm steel plate, my chassis is 7.4mm and then needs some nylon shoulder washers at 1.5mm each side, which is too thick for the amount of thread provided on the end of the cables. The only option I can think of is to cut out a section of the centre rib where the Bowden cables are connected to the equalisation unit and place a stainless steel plate here to provide the right thickness. The rod is about 15’ long in 5’ sections and is supported where it passes through the trailer frame, even with this the situation is not simple, the rod is 9mm with the ends where the connecting threads are rolled out to 10mm, you would think that it would be a simple job to cut the rod to size and remake the screw threads, but no! If you make a cut you are then left with a 9mm rod for which you cannot get the correct fittings. The correct method is to cut from the centre of the rod and weld the two end pieces back together again, (the welder I spoke to said as it was made from high carbon steel it would need heat treatment to take away the brittleness from the weld and he would rather not do the job). I took the easy route and cut some threaded bar to make up the correct length. I just can’t understand why people design things to work in a difficult way. To prevent corrosion I painted the rod and nuts with Hammerite, also helping to lock the nuts in place. BunksI know that I will require bunks to support the boat but at present am not sure how this will work. Obviously the keel/skeg will take the main load with side supports to hold the boat level. I think at present the best method will be to place the keel bunk and cover it with bunk carpet, while the boat is being built some plastic sheeting can be used to keep this clean. Once I have the boat on the trailer with a couple of supports at the rear, I can then concentrate on shaping and fitting the main bunks. I know some people dislike using bunk carpet on the boat because of the friction it causes, preventing the boat from launching, but I figured that I would try it for a while, before possibly replacing it with a layer of low friction, impact resistant plastic, like Nylon. I also want to have some mechanism to locate the skeg and guide it onto the bunk, these can be fitted and designed when the boat is on the trailer.
Notes
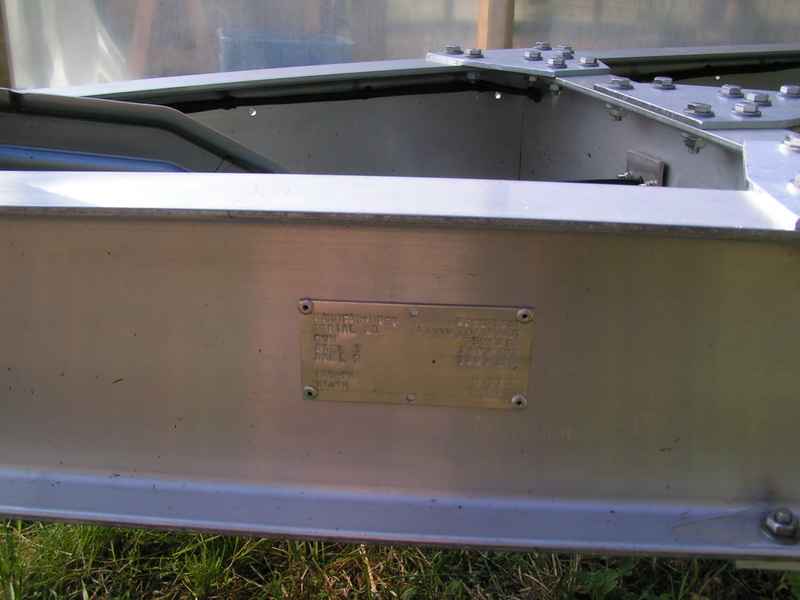
VIN plateWhen the trailer is finished it needs to have a Vehicle Identification Number (VIN) Plate attached, this gives basic information about its manufacture and weight capacities. Here in the UK any trailer towed by a car must match the cars towing capabilities, even if the trailer is light because it is empty, it is illegal to tow it with an unmatched car. This is one of the instances in the law where we are punished for a crime we may commit at some future date by loading up the trailer.
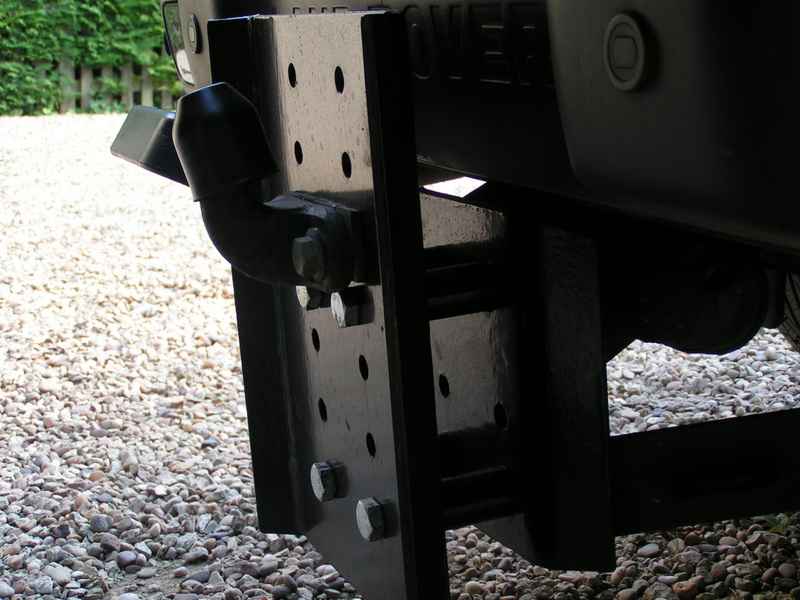
Trailing You would think by now that I could just hook up the trailer and go, unfortunately that is a very simplistic view. Because the trailer has an 8” aluminium frame it is too high to fit the tow bar on the car, it measures 25” to the centre of the tow ball, where the car measures 20” and guess what, the tow ball is not adjustable so I needed to get a steel plate and some standoffs to make an adjustable attachment.
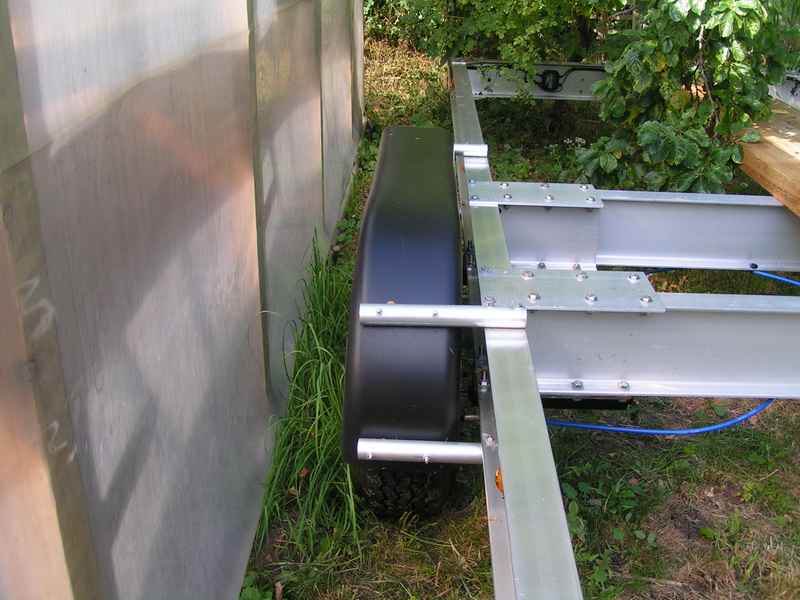
Mudguards It’s a legal requirement that all trailers in the UK have mudguards. No point in putting them on in the garage as it was a squeeze to get the trailer out as it stood. Now to put the mudguards on I could have cut the plastic and inserted some angle brackets, in the end I decided to attach external supports in the form of aluminium tube. These provided a solid support even with just the top pair attached.
TestingTrailers do not need to be tested for road worthiness at present, in the same way that cars need a yearly MOT test. What they do need from last year is type approval, this is now an EU requirement for all member countries. As my trailer will be sitting in the back garden with the boat on it, under construction, for the next year and a half at least I will defer getting it type approved till it needs to go on the road. Jobs left to do:
Click HERE for a list of articles by Mike Machnicki |

|