
 Custom Search
|
| sails |
| plans |
| epoxy |
| rope/line |
| hardware |
| canoe/kayak |
| sailmaking |
| materials |
| models |
| media |
| tools |
| gear |
| join |
| home |
| indexes |
| classifieds |
| calendar |
| archives |
| about |
| links |
| Join Duckworks Get free newsletter CLICK HERE |
|
|
| Texas 200 - Part One |
by Garry Osborn – Littleton, Colorado – USA |
| Part One - Part Two During the fall of 2011 I read several mentions of the Texas 200 in one or the other of the sailing publications that I receive, and about the Everglades Challenge and others. Having moved to Colorado in 2004, from Connecticut, where I sailed quite a lot, in everything from a Pearson "PETREL", a Sunfish, a GP14, a Grumman 17" canoe, a Sailstar "ORION", a Rhodes 19, a Sabre 28, a Sabre 34 (not mine), and a Shannon 38 (also not mine), I was drawn to the idea of sailing in salt water again. I can't say exactly why the idea seemed so attractive, but sailing in Colorado is done on very small bodies of water, often in the lee of a dam or the edge of the forest. There's barely enough water in Colorado to drink, let alone sail. On salt water, there always seems to be plenty of room to sail. But, it's a long way from Denver to the sea no matter which way you turn when you go out of the driveway. On the internet I read the accounts of participants in earlier T200s and I studied the photos and the videos, becoming more and more motivated to participate myself. Although I had bought a "MINIFISH", I had sailed it only a couple of times and found that although it is very like a Sunfish, I was not comfortable on it at all. The passage of 25 years since I had a Sunfish hasn't improved my flexibility one bit. At 84 I'm about as flexible as a railroad sleeper.
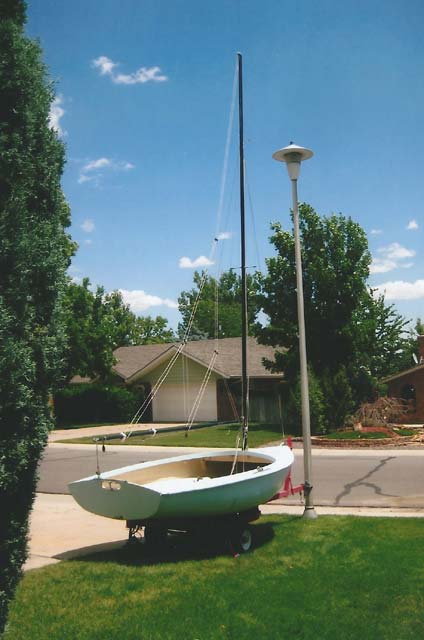
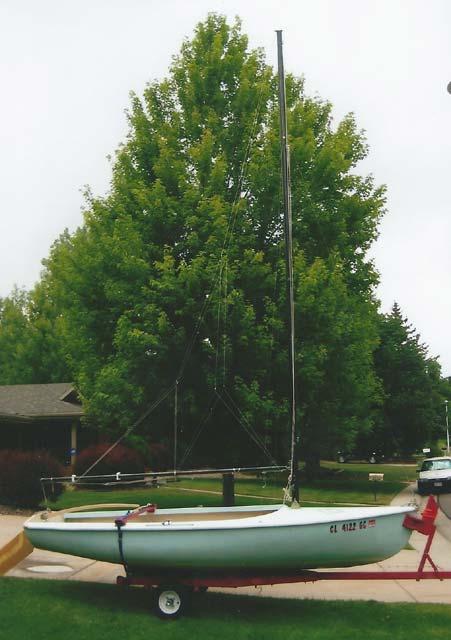
So, I was without any sort of boat to take to Texas and I began to look around and to confront the fact that a sailboat in the front yard would be about as attractive to my neighbors as my submitting an application to the county for a license to establish a bar in my home featuring topless dancers. The boat should go in the garage (not an option, with one half of the garage full of motor-scooters and my wife's car the other half), or in storage. The storage option is both expensive and inconvenient, making it far more difficult to work on the boat to get it ready for the rigors of the T200. Nevertheless, I searched Craigslist. Finding a Suitable BoatI found a very old Lido 14 (number 1533) advertised for what I perceived as a very high price, considering the condition of the boat, but the owner is a tolerant and patient young man, who, when I offered him one sixth of his asking price had the good sense to "keep his cool" while demurring and contact between us continued, sporadically, over a couple of months. Finally, in March, I offered him a sum of money to allow me to use the boat while he retained ownership. I would improve the condition of the boat and when I returned from Texas, he could examine the boat and if he wanted to sell it on his own, he would return my money. If he didn't think he could get more for the boat than I had given him he would sign it over to me and no further payment would be called for. We signed a contract. I could tell neighbors that the boat was borrowed and that it would be gone before the summer was over. I fastened a hitch ball to the street light standard in my front yard so the boat/trailer would stand perfectly still while work advanced. Improvements to the "Blue Lido"The hull was perfectly sound. Black graffiti, "SUR13", adorned one side, The driver of a concrete delivery truck, making a delivery next door said to me, "Do you know what that means?" I answered that I couldn't even read the letters but he told me that SUR 13 is the symbol of the "SURENOS", or southerners, an infamous street gang and that the 13 is a reference to the thirteenth letter of the alphabet, "M", a salute, if you will, to the Mexican mafia. We were not able to totally remove the graffiti, so the boat carried its sinister symbol throughout the T200 and I'm happy to say that there were no negative consequences. The original rudder blade, vertically laminated, had been covered with fibreglass, which had cracked in several places so I removed the covering entirely and repaired the sharp trailing edge by adding a small piece of matching cedar. But fibreglassing is not something I like to do. Instead, I made a new blade out of plywood using a belt sander to shape it similar to the original. I was concerned about the strength and intended to make a second blade to take with me but I never got it done and, fortunately, the plywood blade was plenty strong and survived the rigors of the windy conditions encountered. The tiller was another matter. The laminated tiller that came with the boat was in terrible condition and beyond repair, I had plenty of cedar and fabricated a laminated replacement. BIG MISTAKE! Cedar is much too soft and is not nearly strong enough for the application and we, my grandson and I, suffered the consequences of that bad decision. More on that later.
The mast-head fitting, early on, demonstrated the familiar (to Lido sailers) high friction of the wire halliard against the stainless steel tube that arches over the top of the mast, which caused "stranding" of the main halliard. The mast-head fitting and the wire halliards had to be replaced. I made a double-sheave fitting for the main halliard at the mast head and installed it using the one hole already existing in the mast. (I tried NOT to drill any holes in my borrowed boat.) When it came to make new composite halliards, I elected to install ferrules in loops at the wire ends, using Nico-Press-like fittings that I made on my 65 year old Kalamazoo machinist's lathe. The braided part of the halliard I lashed into eyes thru the wire loops. Years ago, I had made braid-to-wire splices in the halliards of my Rhodes 19 and on those very small wires and braid I remembered that it wasn't easy so I took the easy way out this time. Many of the chroniclers of the T200 have warned that one should be prepared for the fact that there will be a LOT of wind and that reefing capability is a must. To that end I began contacting sailmakers in an effort to find someone who would install lines of reef points in the mainsail and I began to study what might be done to reduce the size of the big (for so small a boat) jib of the Lido. The sailmakers, several of them, answered that they were already booked for work and could not meet my time requirement. Ullman never responded to two attempted contacts. That was disappointing. Finally, Doyle Sailmakers, of Salem, Massachusetts, responded saying, "Send the sails". Andrew Schneider of Doyle was very helpful and they did a fine job at a reasonable cost. For the jib, I contacted "RAVEN", Emilio Marino, the author of "The Sailmaker's Apprentice" and contributor as "The Sail Doctor" in "The Small Craft Advisor" magazine. Raven suggested that I provide myself with a very small, high-clewed storm jib, to be flown on its own separate halliard, underneath, or behind the regular jib halliard, independent of the head-stay. What a good idea that was! I had bought an old jib from a sailboat dealer locally and it was large enough to cut the little jib out of it. I sent this along to Doyle with a drawing showing the dimensions that I wanted the new jib to have. I had determined the dimensions using the Lido 14 sail-plan drawing available on the internet. I read somewhere that a line drawn from jib sheet cleat fair-lead to the headstay, thru the clew of the jib, should intersect the head-stay at a point that is above the tack a distance equal to 40% on the length of the luff. I lengthened the leach by a couple of inches over the calculated length so that any required adjustment could be, hopefully, accomplished by raising the little jib's tack on an extension. In addition to the main sail and the material from which Doyle would make the new storm jib, I sent the regular jib, which needed piston-type hanks installed to replace the plastic, twist-on-type that were on it. RAVEN suggested installing a down-haul on the big jib so that it could be hauled down onto the deck from the cockpit and there would be no necessity of going on the foredeck, a good thing not to have to do on a small boat when it's blowing. The piston-type hanks would prevent the jib from detaching itself from the head-stay, which the snap-on fittings might allow. For the down-haul, instead of trying to arrange a tiny block for the down-haul line at the stem, I made another little torus (1" O. D. x 3/8" I. D.) of Delryn to serve as a fair-lead and it, in turn, was attached by a loop of 1/16 Dacron braid to a tab thru which the head-stay clevis pin passed. Slab-reefing, which I was preparing for, requires fittings on the boom to which the reefing lines are dead-ended and which re-direct the reefing lines along the boom toward the mast. These were made as two-bolt clamps, fashioned out of polyethylene with Delryn sheaves. Because the Lido boom is round, these clamps are quite simple and they permit forward and aft adjustment along the boom so that the tension in the "foot" of the reefed sail can be properly established. Just behind the mast, mounted on the goose-neck, I made a bracket in which there are two fair-leads to direct the reefing lines upward to the reef cringles in the luff of the main. With the Cunningham, three halliards and two reefing lines to be terminated near the foot of the mast, more cleats were required. I bought three three inch cleats from West marine and mounted them to an aluminum plate, the fastenings of the middle cleat pass thru the sail slot in the mast and screw into a fibreglass rod inserted in the sail groove, the rod being drilled and tapped to receive them. I envisioned that it would be wise to have a topping lift to support the boom while reefing and during furling the sail when putting the boat to bed at night, but unlike my Rhodes 19 which has a permanent back-stay, a topping lift would constantly be in contact with the big roach in the Lido's mainsail. Raven suggested that I consider arranging "lazy-lifts", which I understood to mean a combination of "lazy-jacks" and "topping-lift". In my new mast head fitting I provided fastenings for small-diameter line on each side of the mast. These were about ten feet long and terminated in a Delryn fairlead-eye, attached to the supporting line using a MUSTAD fishing swivel so as to prevent fouling of the lifts due to twisting of the line. These tiny swivels have a strength of about 250 pounds so they're strong enough for the duty. On each side of the sail, another piece of this small line runs thru the hanging swivelled eye, terminating at each end with another swivelled eye, making three swivelled eyes each side of the sail. Now, from the top of the mast on each side of the sail we have an inverted Y, the tail of the Y at the top of the mast and with swivelled, fair-lead eyes at the junction and at the ends of the two branches of the Y. Finally, a long, one piece line is lead continuously from the bottom of the goose- neck, up through one of the four lower swivelled eyes, down under the boom to the other side of the sail, up thru the after swivelled eye on the other side, back under the boom through a hole provided for it in the aftermost reefing block-clamp, up thru the aftermost swivelled eye on the other side of the sail and under the boom again, up to the swivelled eye and back to the bottom of the goose neck. I can see that this description is too confusing to serve the purpose, but the long continuous line forms a big letter M above the boom on each side of the sail into which the sail subsides during reefing or furling. AND IT WORKED! Reeving the lower line and inserting the sail into this supporting mesh (mess?) each time the sail was installed was tedious but we only had to do it once for the T200.
|
|