and boarding steps, or grab handles
Over the past few years I've built seven mouseboats. I've tried different ideas for handles to carry the boats by and tie a bow line to. In keeping with their cheap build most have gotten a simple screen door pull handle.
On one boat I put real stainless marine boat cleats. These turned out to be a bad idea as they tended to catch on my clothes or life jacket when I was reboarding the boat from the water. I like to swim or snorkel towing the boat around and getting caught on the cleat was hard to deal with as it required much more energy to get unstuck and into the boat. In the event I fall in without expecting it, I don't want anything making it hard to get back aboard.
The other problem was actually using the handles to carry the boats. I built the boats for my kids to have fun and learn boating, paddling, swimming, camping and exploring. The thrill of being in charge of your own boat is as big as the first time a kid is on a bike without training wheels. However, each time we moved the boats my kids complained that they were too heavy to move with just one hand.
Most of all I don't like using any kind of fasteners in my boats, "staples, screws and nails cause leaks, rot and disaster". All my boat joints are fully joined with marine epoxy, and on my Teardrop trailer every joint is glued with the best construction adhesive. Metal fasteners also introduce a stress point into the wood. Marine epoxy and fiberglass tape or a chine log and construct on adhesive are both stronger than the wood, however the stress is spread over the whole length of the joint. Putting screen door pull handles in the boats required holes into the boat hull. Potential leak points that would cause rot, delamination, and eventually ruin the boat. While building three mice this spring, I was trying to come up with a better handle design and while looking at a piece of PEX tubing I came up with this idea.
Thanks to the advances in epoxy these handles can also be added to fiberglass and plastic boats. The free book from Gougeon Brothers (West system) identifies and explains which epoxies will stick to what, and whatever methods will give the best attachment.
On my kids boats I ended up putting three handles on each end, two for their hands and one in the middle for a tow/tie off rope. On the boats for the wife and I, one handle on each end works fine as both boats are very light. For heavier boats two handles would be better. Another idea for these kind of handles would be for reboarding steps/hand holds for larger sail or motor boats. Just make the tubing loops large and long enough to put your foot into.
All the pieces of this build are cheap and in my case they were free and left over from my ongoing boat building project and scraps from my plumbing projects. The webbing is from an old strap that the latching mechanisim got rusty. Since I was building boats using the stitch and glue method anyway, I have plenty of marine two part epoxy. I started with MAS epoxy and ended up with cheaper stuff from duckworks but both work just fine.
 |
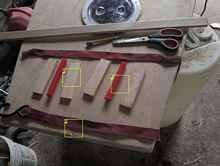
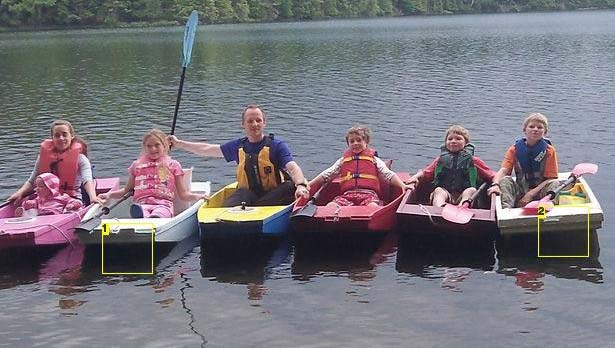
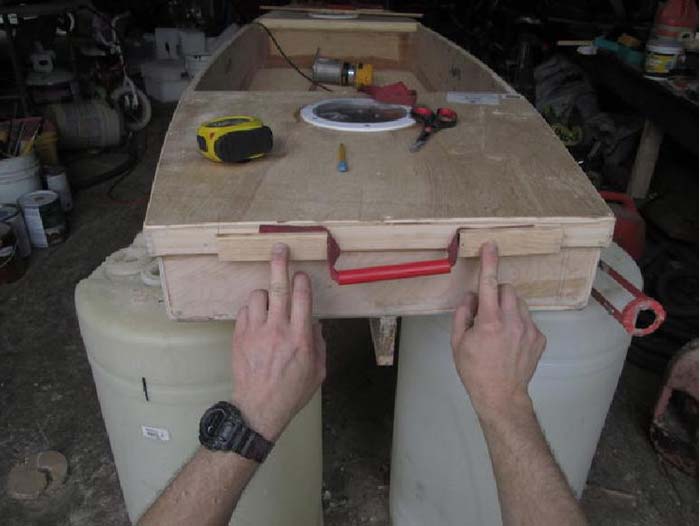
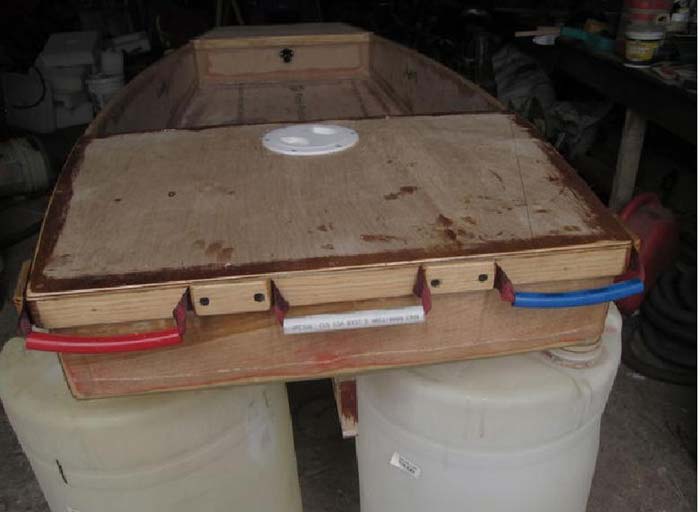
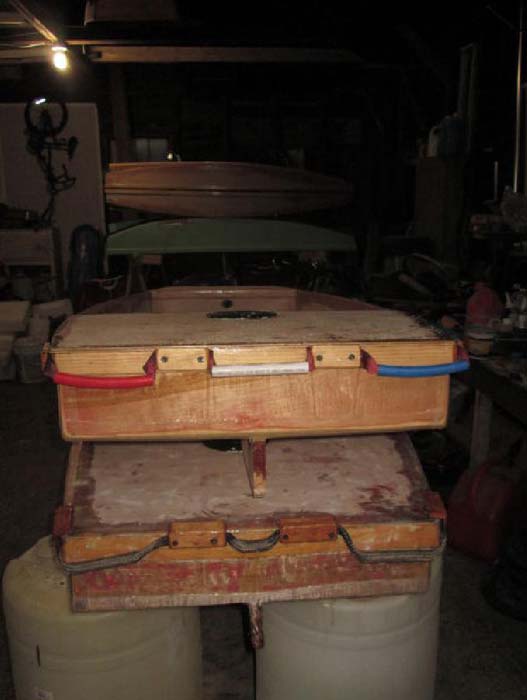
1. Triple handle for children
2. Screen door pull, the two boats on this end are older |
 |
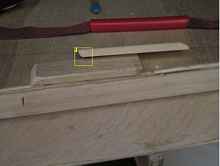
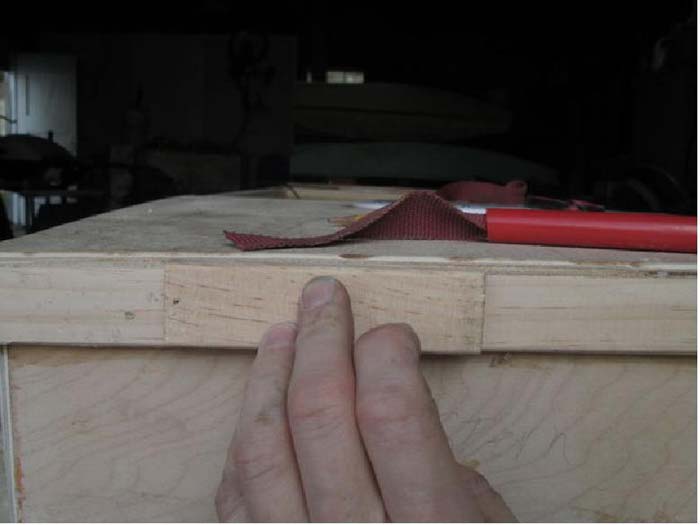
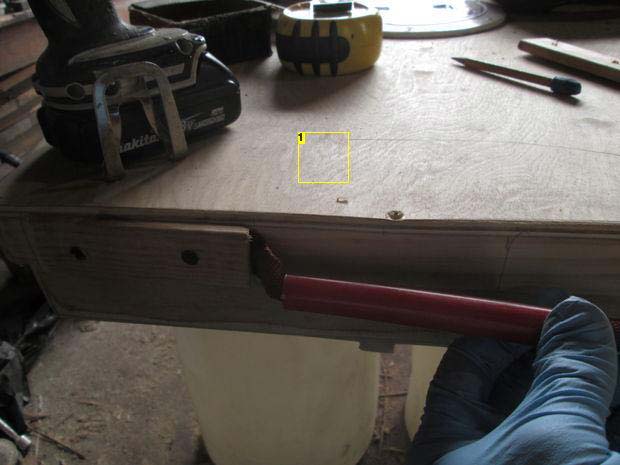
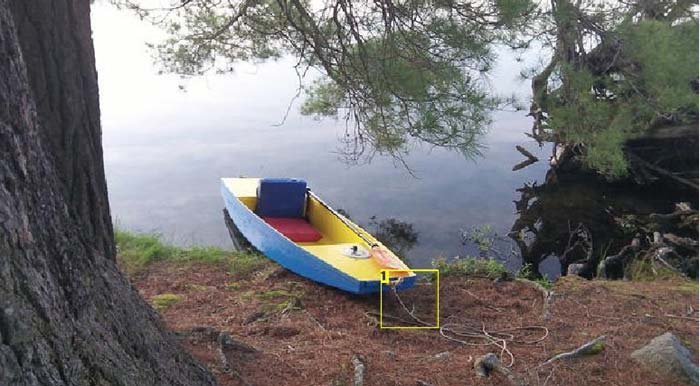
1. finished mouse boat handle, while painting the hull the boat hung from this
handle for two days. |
 |
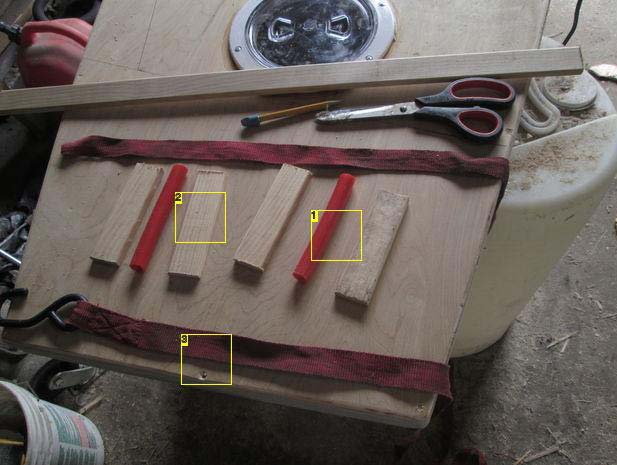
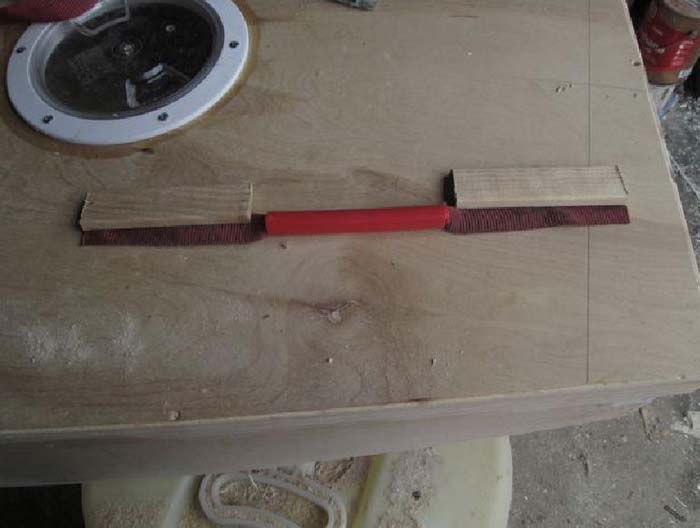
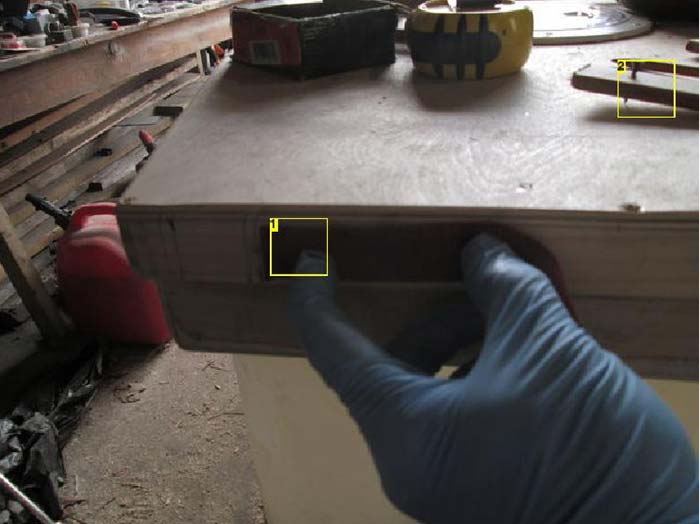
1. PEX tubing scrap
2. Framing scraps left over from building
3. Nylon webbing cargo strap |
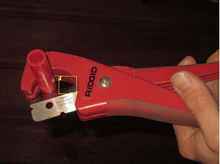 |
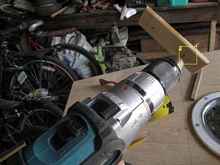
1. PEX tubing cutter |
Step 1: How big is your hand?
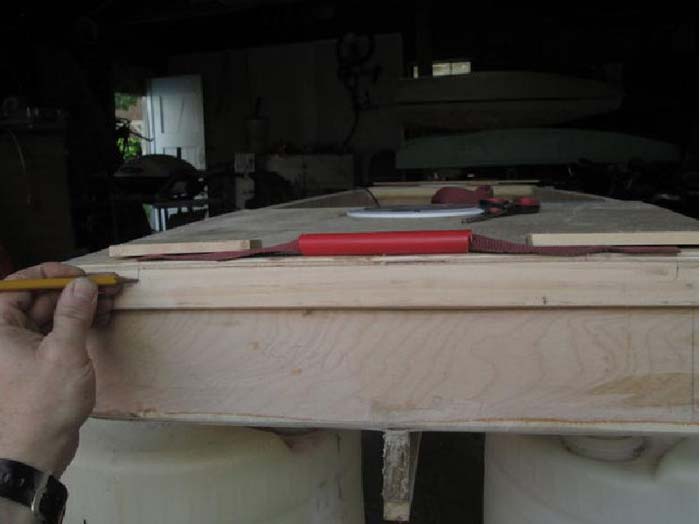
Once you have the webbing, tubing and epoxy, you need to determine where to put the handle. For towing and being towed an attach point for your rope in the center is the best. My boats are square on the ends, for pointy ended boats a handle could be put on either side, across the top rails, or lengthwise on the bow deck of a kayak. Really anywhere you want a simple hand hold these would work fine, just make sure they won't interfere with your paddle, oars or sails.
For loop size I used my large mechanic hands, cutting the PEX tubing about a half inch longer on each end. One of the boats I used door pulls for I can only fit three fingers into the pull, uncomfortable on a long carry.
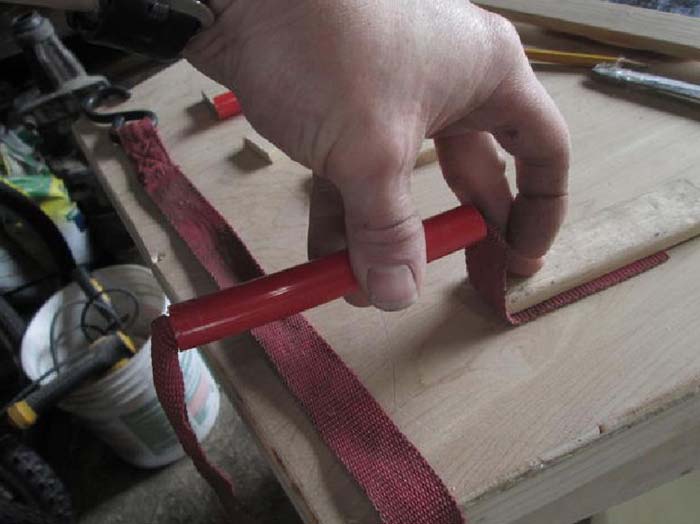
Then I fished the webbing through the PEX, after determining how much webbing I thought should be trapped under the wood trim, (2.5" IIRC, this is my own guess, so far it has worked fine).
Then I used my hands to figure out how much knuckle clearance I wanted. Because the webbing is flexible, I figured how it would allow the handle to lift above the edge of the boat, then allowed clearance for my hand with the strap flexed 90 degrees upward.
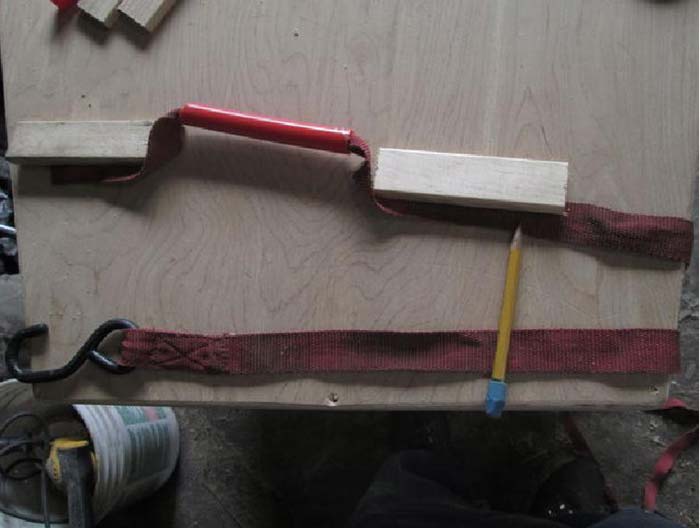
I sized my wood blocks based on the length of the webbing laid out flat, the extra length of the wood after the webbing is adjusted for the height of the loop and will add to the strength of the epoxy joint. I might be able to get away without the longer wood, or even any wood at all, but I haven't tried that yet.
After figuring out how much shorter the strap would be than the wood blocks, I marked it all out on the boat so there wouldn't be any question about where each part went when it is all slippery and I have limited time to get each part set before the epoxy kicks.
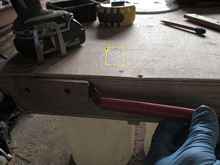
The final picture shows how the handle should look when it is glued in place.
Step 2: Commencing to begin
A few more details that should be taken care of before you go mix your epoxy:
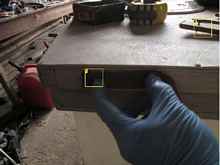
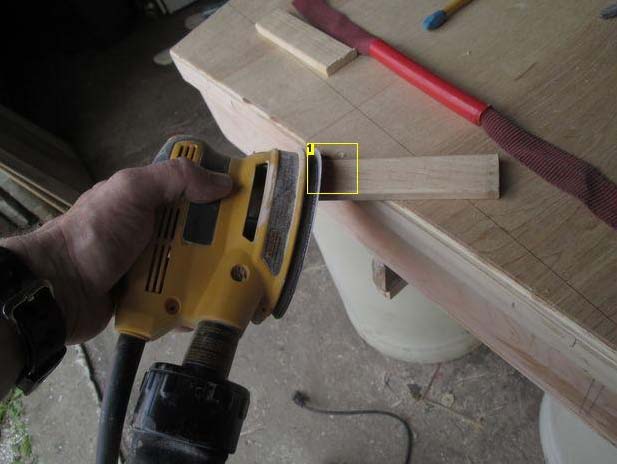
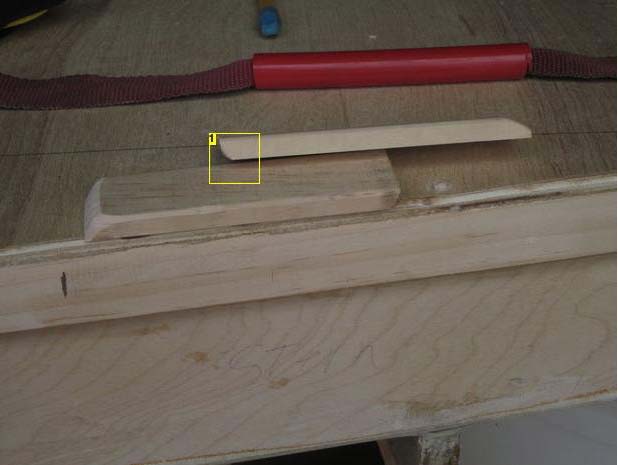
First, I rounded off the edges of the wood blocks, on the outer edge to make them not as likely to grab anything, and on the inner ends to minimize any stress on the strap where it goes around the end of the block.
Second, I drilled holes through the wood blocks so they wouldn't split when I put the drywall screws in to hold them while the epoxy cured. After the epoxy cured, I removed the screws and filled the holes with more epoxy, since the epoxy is stronger than the wood the blocks should tear the end of the boat off before they fail.
 |
1. Shaping the ends of the blocks. |
 |
1. Tapered ends for looks and stress relief. |
 |
1. Pre-drilling the blocks to keep them from splitting. |
Step 3: Pre-planning is the key
Cut, mark out and measure. Sand and drill all the parts for the other handles you want to add BEFORE you mix your epoxy. I never get exactly the right amount, usually too much. Rather than having many wasted batches of epoxy, plan and prepare any other handles so you only need one epoxy batch to do the whole job.
I started by working the epoxy into the webbing with a paint brush. Just like working epoxy into fiberglass this works best by dabbing the epoxy into the weave by pushing it in with the tip of the bristles, rather than brushing it on like you would paint. (Imagine more the type of work you would do with a paint brush if you were trying to fill a crack with paint.) I stretched and shrunk the webbing during this step to help work the epoxy in fully. Then I put the webbing in place on the pencil marks I made before. The wood blocks got another layer of epoxy on the mating surfaces, and then were screwed in place.
Epoxy should ooze out of the joint, this lets you know you filled all the voids, if it doesn't ooze you will have a weak dry joint unless you are perfect at estimating exactly how much epoxy is needed (not me).
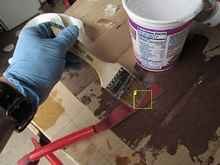 |
1. Working the epoxy into the webbing. |
 |
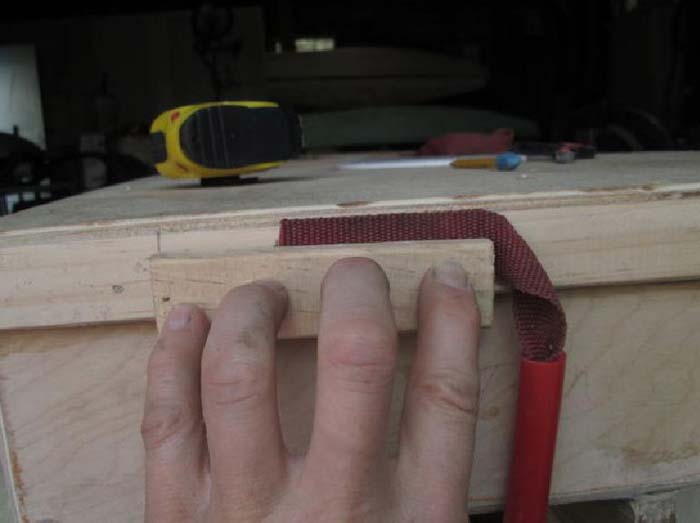
1. Sticking the epoxied webbing to the boat
2. Put the screws in the blocks ahead of time to minimize assembly time. |
 |
1. One side on, now for the other.
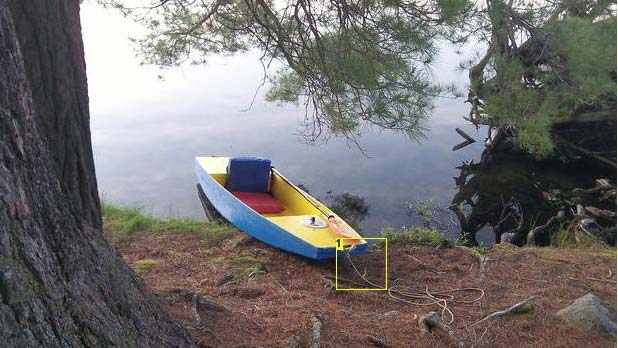
1. Dangerous cleat
2. Safe flexible, cheap, rust and fastener free handles |
 |
1. Don't worry about the color of your pex or webbing, paint will stick very well and
hide it. |
Step 4: Three of a kind
I added to the idea for my kids, they complained that it was too hard to carry the boats with one hand, they wanted two handles, so I gave them two. However, attaching a rope off center for towing would make the boat go crooked. Adding a third loop in the middle of both ends gave me a tow/tie down point as well as two handles. The extra handles don't give my kids any problem.
Getting back in with these boats you climb back in over the end of the boat. Since the handles are flexible, they flex out of the way.
In the second picture the lower boat has another idea I tried. I have a short piece of hollow webbing, from somewhere, I shoved smaller diameter pex into it instead of putting the webbing through the PEX. I'm not sure which is better, but I like the PEX over the webbing better.
 |
1. finished mouse boat handle, while painting the hull the boat hung from this
handle for two days. |
|


