
 Custom Search
|
| boat plans |
| canoe/kayak |
| electrical |
| epoxy/supplies |
| fasteners |
| gear |
| gift certificates |
| hardware |
| hatches/deckplates |
| media |
| paint/varnish |
| rope/line |
| rowing/sculling |
| sailmaking |
| sails |
| tools |
| join |
| home |
| indexes |
| classifieds |
| calendar |
| archives |
| about |
| links |
| Join Duckworks Get free newsletter CLICK HERE |
|
|
| April Treasure Chest |
Removing PaintChuck Epoxy Basics
This is an excerpt from the e-book, "Epoxy Basics" by Russell Brown provided with permission from the author.
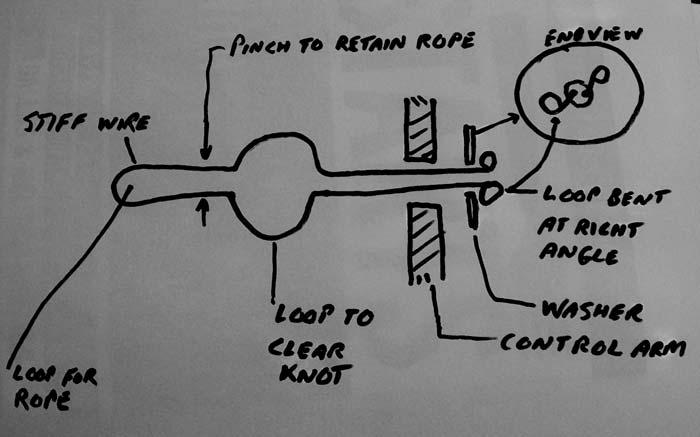
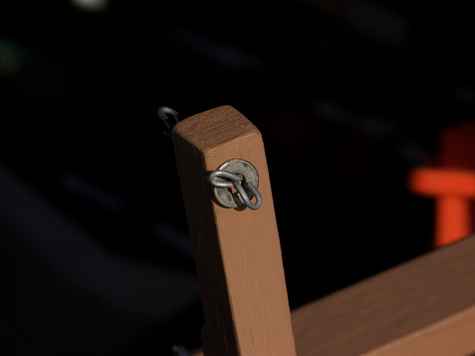
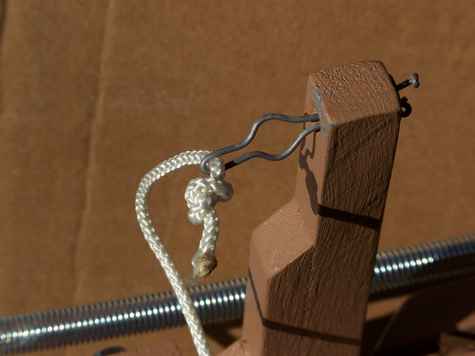
Chuck Rope ConnectorAttached are pictures of a rope connector I made..
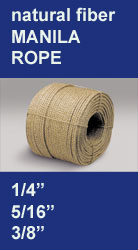
The objective is to make a quick disconnect system for attaching my kayak rudder steering arms to the control ropes - a pull-pull system. There is no hardware needed except for the 2 wire devices and 2 washers attached to the rudder stearing arms. The rope I used is 1/8 inch diameter round synthetic sash cord. The stiff steel rust resistant wire is about .090 in diameter was salvaged from wrapping on a shipping pallet. The pictures and drawing are self explanatory. I'll comment that the two retaining loops on the wire ends are each large enough to NOT pass through the hole in the washer should the pull on the system straighten out their right angle bends. The pinch in the wire is enough to keep the rope from backing out from the pulling end of the connector when slack but yet easy enough to slide the rope through to make the connection. I made the large loop big enough to pass the figure eight knot at the end of the rope. The system is easy to adapt and form to other sizes of rope or cord. With proper sizing the knot will not pull through under moderate stress, nor the wire ends through the washer. A little WD-40 will keep rust a bay if you don't have stainless wire or washers. Frank Campion We have something similar in the Duckworks Store. Canoe Rack
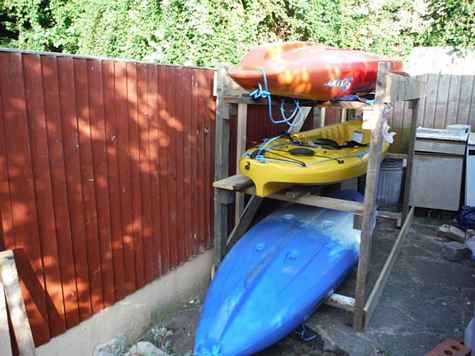
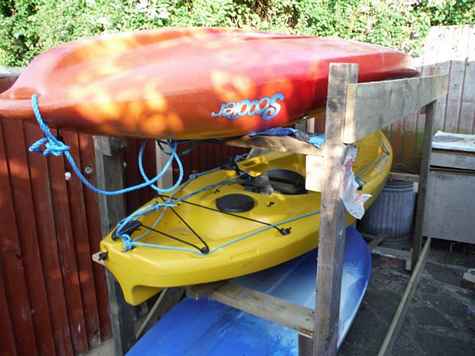
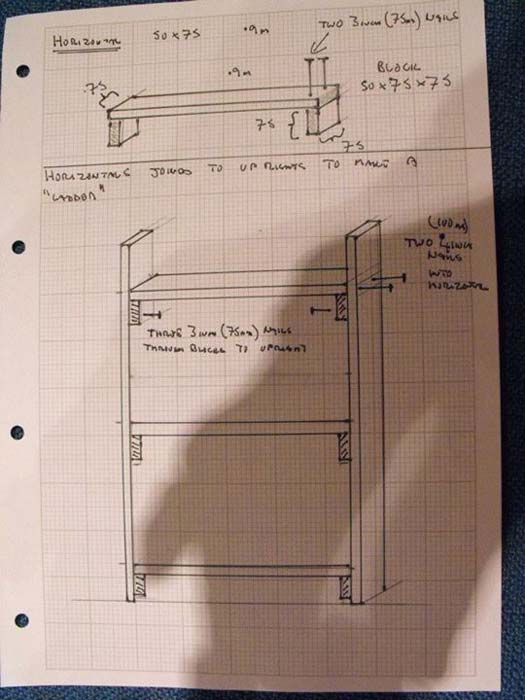
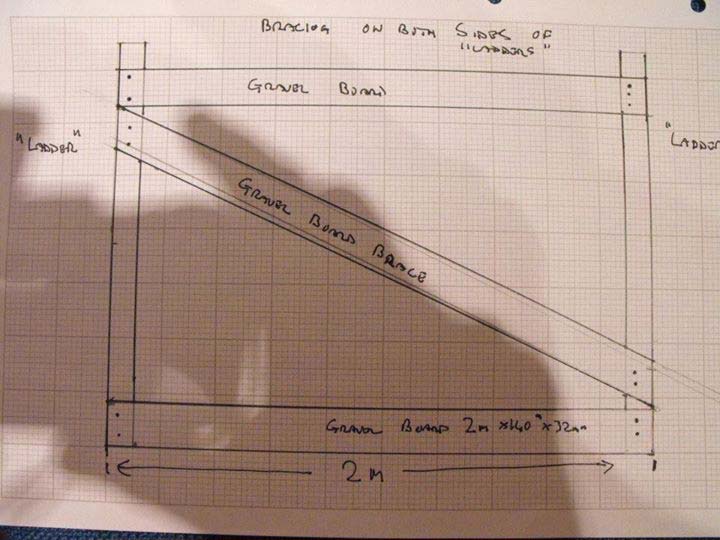
Needed a canoe rack for the SOT's - so using old (18 year old!) timber from the demolished porch built this rack. Four uprights 1.5 m, six horizontals .9m and five gravel boards 2.4 m long. The uprights are 55 x 75 mm (2inch x3inch) and the gravel boards are 22mm x 140mm. I made two ''ladders, from the uprights. Uprights marked from the top at 200mm, 560mm and 600mm. The top surface of the horizontals is level with this line. On the ends of the horizontals I placed blocks of wood attached to the horizontals. The tops of the horizontals were placed on the 200, 560 and 600 lines and the blocks fixed to the up rights. One set of ladders I drilled and screwed (too much time) the other, I nailed, using 3 inch nails on everything and two four inch nails through the uprights and into the horizontal on each side. The nailed, redneck ''ladder'' better looking and more rigid than the screwed one, so that was nailed with the four inch nails. The gravel boards were measured to 2m, a line drawn and these were nailed with 50mm nails to the bottom of the upright and to the top of the upright, in line with the top of the top horizontal. A diagonal brace of one gravel board went from the bottom of one upright to the top of the other, and was nailed with 50mm nails. The rack was put upright and the next lot of bottom and top gravel boards nailed in place. No diagonal brace was needed as structure was rigid. Boards were laid across the horizontals for the SOT's to lie on (boards were ply ''stretchers'' -300mm x1.8mm ply nailed to 2.4m lengths of 25x50mm battens -from the A frame rack). Andre |
To comment on Duckworks articles, please visit one of the following:
|


 |