|
A large mistake I made a few years later was to start building my *ultimate* boat. This was in 2000, and I had finally decided on Karl Stambaugh's Mist. It was truly a large boat, 20 feet long, but 8 feet wide with a deep and cavernous hull. I knew I didn't need it since the Nancy's China had already proven herself to be big enough in many respects. But I wanted to build a bigger boat as a follow-on project.
 |
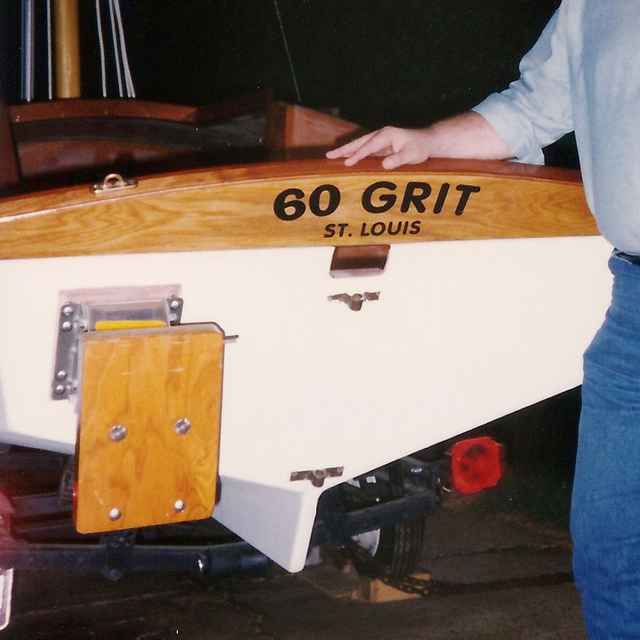
Outside of Transom with Doublers
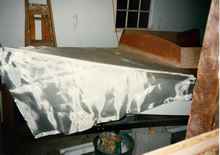
The plans called for the usual cutout along the top of the 1/2 inch plywood transom for the tiller to pass over, but I liked the idea of continuing the coaming along the top edge of the inside of the transom, and the rubrails along the top edge of the stern. I also thought the transom should have a doubler along its top edge, so it got one inside and out. Much more weight way aft, but it's really strong and looks nice.
The tiller passes through a hole in the transom, which by that fact keeps the rudder from floating off the gudgeons. I've never had a following sea put any water through there, even running across Carlyle Lake in the rollers in a stiff breeze.
The doubler for the folding motor mount was installed on the outside of the transom, necessary for its handle to clear the thickness of the double along the top of the transom. I used a lot of expensive hardware where it made sense and aesthetics, stainless for the standing rigging and bronze for the running rigging. |
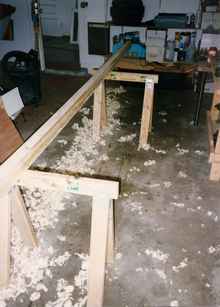
I had spent hundreds of hours taping and glassing over the previous ten years, but the realization of the enormity of this project came when the 50 yard roll of wide (9-inch?), heavy tape arrived. I just couldn't face all the hours I envisioned it would take to apply. Taping, glassing, fairing and finishing are probably the least fun parts of boatbuilding for me. Sawing, planing, and sanding are much more enjoyable. Anyway, the hull panels were given to a friend, and I was relieved to get over the big-boat phase of my life, having spent less than $1000 on it.
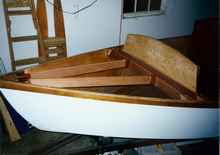 |
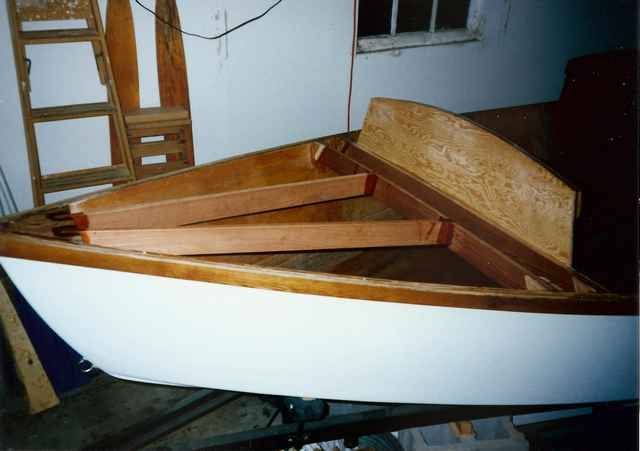
Foredeck Beams
You can see the extra foredeck beam I added to support the deck-stepped mast. The plans called for a keel-stepped mast, but I thought this would be way too hard to raise and lower, and it would have been. I added shrouds and a forestay to support the mast, and later added a tabernacle. I should also have reduced the mast diameter from three-and-a half to three inches, since it didn't need to be nearly as strong as the original design, but didn't think of that at the time. |
Sanding was the most therapeutic aspect of building 60 Grit, and there was a lot of it. Most of the sanding was done by hand with 60 grit garnet paper on a wooden sanding block, and a lot was done with a Bosch random orbital sander with 60 grit discs. Hand sanding didn't take any longer than using the Bosch, but it took a lot more energy. The Bosch was much more useful on larger areas than on shaping and smoothing smaller wooden parts. The 60 grit paper removed a lot of material, both wood and fiberglass, and was smooth enough for the next coat of epoxy. 100 grit just didn't remove enough material, but I used it to remove the scratches from the epoxy before the first coat of varnish.
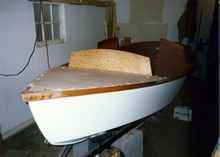 |
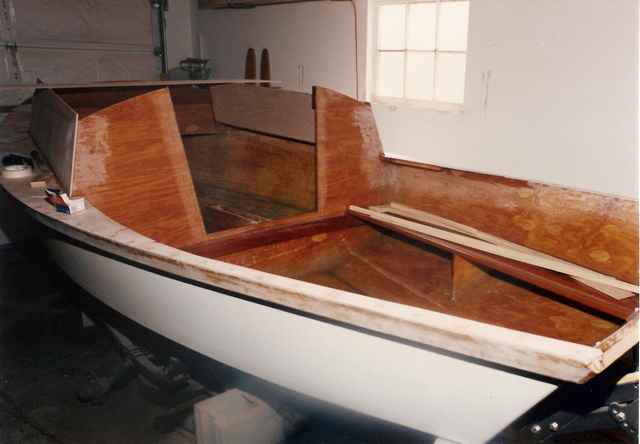
Foredeck First Layer
The foredeck was 2 layers of 6mm okoume. By this time I either wasn't able to get any good 1/4 inch fir or luan, or had wised-up and ordered enough 6mm okoume for the decks and cabin. |
Originally the entire deck, cabin and cockpit were varnished, and the topsides and bottom painted white. This was easy, quick and looked good to non-boaters. In recent years I've spent more time when refinishing, sanding a lot more with 100, then 150 before varnishing, and 220 between coats. I've also painted the decks and cabintop, which does look better, and has more traction to walk on. I also painted the bottom to look more yacht-like.
 |
First Layer of Side Decks and Cabin Sides - Fore and Side Decks First Layer Glued Down |
The Cartopper had suffered, from close-up anyway, from a distinct lack of sanding. I also had done very little wood-working while building her, having found most of the wood sized as needed at lumberyards, such as the 1x2's to frame the transom, and the wooden poles for the mast and sprit. I also used a popular and colorful oil-based paint, which did not adhere well over the epoxy.
 |
Glassing the Foredeck
A layer of 6mm okoume was added to the outside of the 1/2-inch fir cabin front, to match the rest of the cabin and add more weight. This was a very good idea, but it would have been better to simply use okoume in the first place. The decks and cabin top were later painted cream, and the cabin front and sides left bright. |
The Nancy's China needed more custom woodworking, so after pre-measuring/lofting/cutting, and then assembling the side, bottom, transom and bulkhead panels, the rest of the boat was custom-fitted a piece at a time. I learned to do a lot more shaping with my block plane, spokeshave, and hand sanding block. A common routine for an evening after work was to measure, mark and cut out a part, a foredeck beam for example. Then fit and plane the bevels, plane and sand the bullnose, and epoxy it into place. Then look forward to fashioning the next part tomorrow. It was a habit I enjoyed, and repeated many days to complete the decks and cabin.
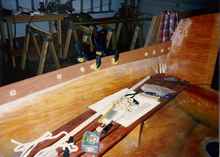 |
Gluing On the Cockpit Coaming
This was prototyped with a plywood template before cutting the andiroba. Most clamping was done with drywall screws through 1-inch squares of 1/4-inch plywood pads, with 1-inch squares cut from a heavy plastic bag to prevent glue-on. Occasionally the drywall screws would get glued-in and snap off. These were drilled-out with great difficulty, using a piece of brass tubing as a hollow bit. |
I bought all the mahogany locally, at around $6 per board-foot at first. Toward the end I bought andiroba for about $4, because the mahogany had gone up quite a bit. It was a little softer and darker than mahogany, but worked well for the cockpit coaming.
I also bought all the oak locally from an old hardwood warehouse, now long gone. The rubrails appeared to be recycled siding about 1/2 inch thick and over 16 feet long, so I didn't need to scarph or thickness-plane them. The outside transom doubler was matching 1 inch oak. These made the boat even heavier and tougher.
 |
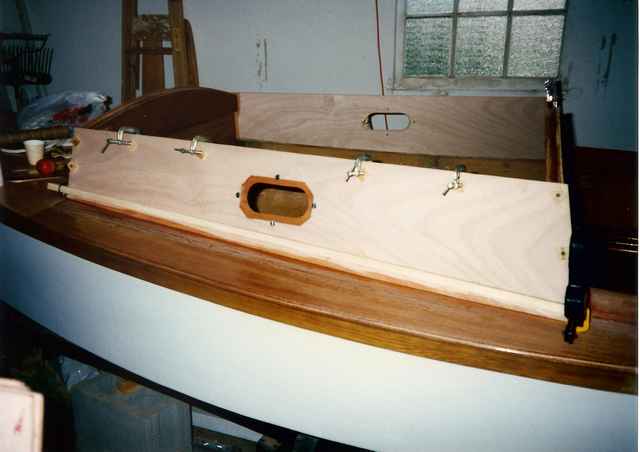
Gluing Second Layer of Cabin Side
The hexagonal rectangle cut out of the outer layer receives the double-thickness safety glass deadlights. The oval cutout in the inner layer matches the bronze frames I was able to buy for about $10 each from Doc Freeman's. |
I later used a similar process for building my Swamp Yankee Canoe. I made the thwarts and breasthooks from leftover mahogany from the Nancy's China, and was able to find 12 foot lengths of 1/4 inch by 1 inch shaped oak trim to use for the rubrails. So the canoe looks like the baby of the micro-cruiser.
 |
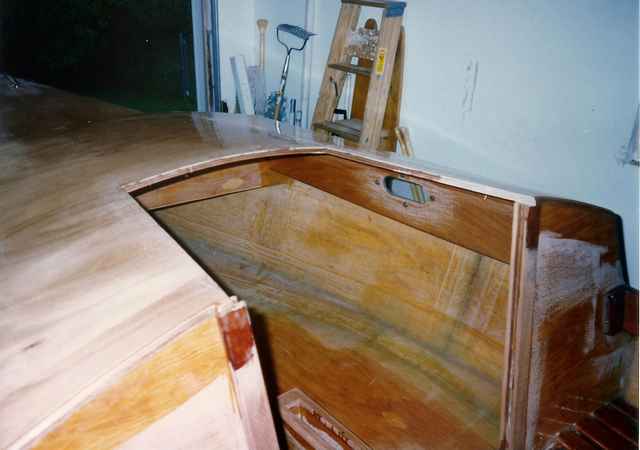
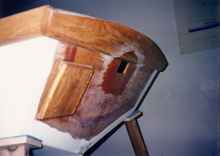
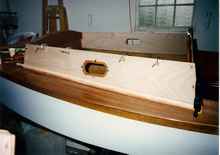
Hatch Opening and Companionway
To greatly increase the headroom in the cabin (in spite of making the sole too high), I omitted the cabintop beams and laminated three layers of 6mm okoume instead of two. This may have been more than needed due to the camber, but I can walk anywhere on the cabintop, and it doesn't flex or creak, and it's not much extra weight.
The guides for the drop boards are roughed-in, and you can also see the top trim of the daggerboard trunk roughed-in. The drop board guides were pre-shaped before they were glued-on, but the daggerboard top trim was glued-on somewhat rough, then shaped in place, to make sure it was faired into the trunk, and where it met the drop board trim along the main bulkhead. |
I was also able to achieve a noticeable improvement in finish on the Swamp Yankee over the Nancy's China. The fillets and taping were much smoother, requiring very little sanding, and overall I used more 100-grit paper to smooth things, and 150 and 220 before varnishing. If I had given the canoe a formal name, I would have called 100 Grit.
 |
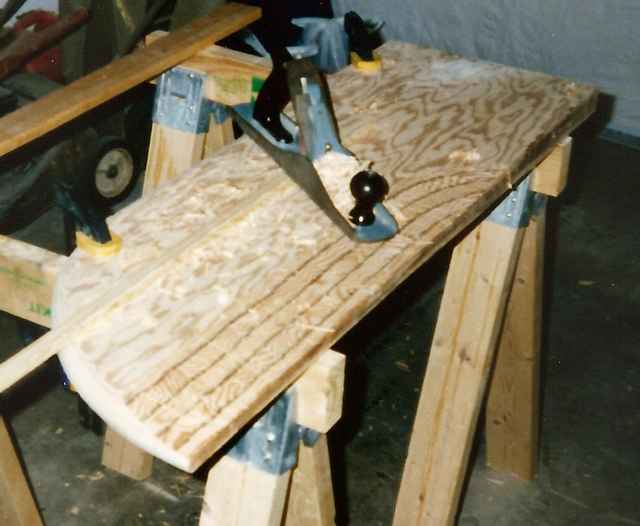
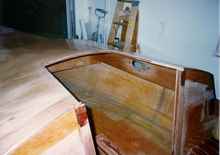
Planing a Tapered Trailing Edge to the Daggerboard
The daggerboard is three layers of 1/2-inch fir, with 30 pounds of lead poured into a cutout near the bottom of the middle layer. It was glassed, heavily around the bottom edges. A major change I would definitely make if I built this boat again would be to convert the daggerboard to a centerboard. This would be a big convenience for sailing in Midwest lakes and on the Florida Gulf Coast. I would keep exactly the same dimensions and position, and simply extend the trunk aft through the main bulkhead and into the cockpit. There would still be plenty of foot room in the cockpit, or room for a bucket when needed. |
I paid a lot of attention to the ergonomics as I fitted and built this boat. I made small adjustments in the height of the cockpit seats, and height of the boom, to be able to easily see over the cabin and under the mainsail. The cockpit coaming was adjusted in height and width to be comfortable for me to sit against without a cushion. The length and height of the tiller were fitted similarly.
 |
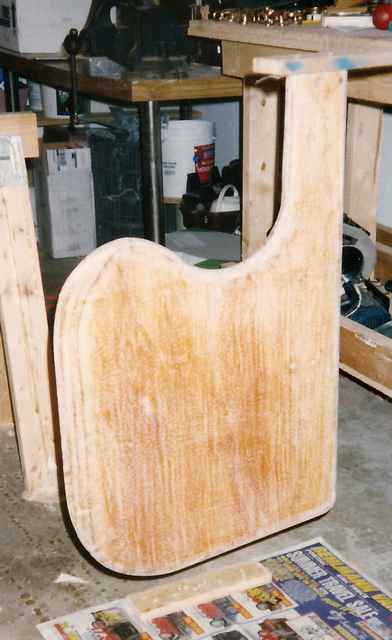
Preparing to Finish the Rudder
I would also convert to a kick-up rudder, but haven't thought about how to do this while keeping the same rudder shape. |
I also raised the cabin sole a couple inches higher than what the plans called for to get a larger flat area for sleeping and storage. However, I lost some critical height inside the cabin, so the only place I can sit straight up is under the hatch facing forward.
That's not too bad, since sitting against the side is less practical anyway due to the trunk cabin, but it would be better to have more flexible seating. It turned out that there was more than enough floor area anyway, because I sleeping partially on the exposed slanted bottom as the boat heels slightly from me laying on one side. There is plenty of room for storage on the other side.
 |
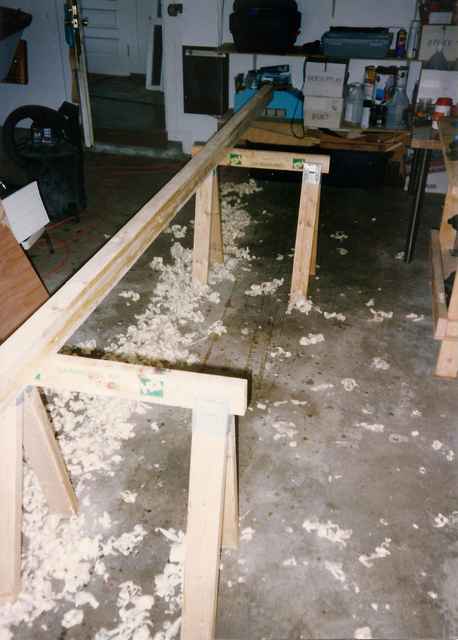
Mast Blank Laminated from One-By Spruce
I bought some nice 16 foot 1x6 spruce boards to laminate the mast. Even this wood was no longer available locally in 2008, as I could only find white pine in 16 foot lengths for another project. |
I usually sit in the cockpit to cook breakfast, and the storage compartments in the cabin floor are easy to reach from there. On cold mornings I open the hatch a few inches and cook inside the cabin to warm up. I've spent a few days at a time without going ashore, and life onboard is comfortable and lazy. The cockpit is big enough to stand up in and stretch my legs, and both the cockpit and cabin are comfortable for lounging around in hot or cool weather.
 |
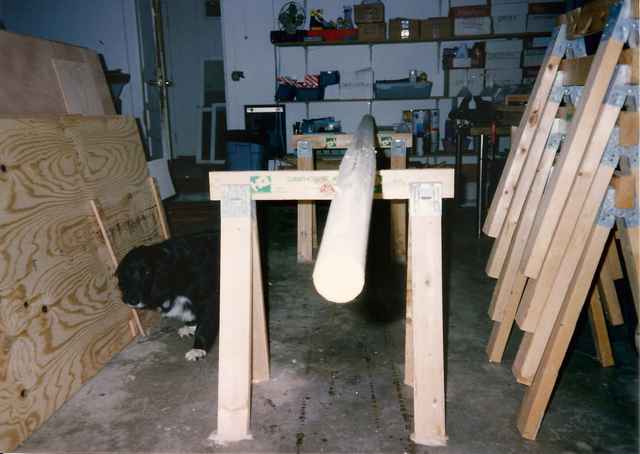
Mast Planed 16-Sided and Ready to Sand
Kinston didn't like the noise of the power tools, or even the aggressive use of hand tools, such as when planing and sanding the mast. On the water, his preferred station was up in the bow of the canoe or the Cartopper, nose leading the way. He was restricted to the cockpit and cabin of the Nancy's China, and was sometimes nervous when sailing, when I was nervous due to gusty winds. He would have much preferred an open boat, or a walk-through cabin with a bow well, as is more practical and popular nowadays. |
I used 1/4 inch bronze screws as "chicken screws" near the forward and aft ends of the rubrails, because the oak had to be jacked into its curved position along the sheer. The rails were fully glued in place, but I was worried that the epoxy might fail under additional stress.
In 1999 I kept her in a slip at Boulder Marina on Carlyle Lake, IL, during the summer and fall. Apparently the heat, humidity and the way I had mounted a cockpit cover in the oarlock sockets caused the coamings to come loose near the center of the cockpit. So I re-epoxied the gaps and clamped the coamings neatly back into position, then added bronze screws there also. The rest of the boat is completely fastened with epoxy - no other screws except to mount hardware.
 |
Hand of the Artist (Not Mine)
Hand and handiwork of the graphic-artist friend who made the lettering for the transom. |
The marina was a longer drive around the lake, but it was really nice to have the boat ready, and just go there on Fridays after work. There was a lot more maintenance though: in addition to the coamings springing loose, the sun took a toll on the uncovered varnished foredeck, and the bottom, daggerboard and rudder were a slimy mess at haul out, even with real bottom paint.
Currently she's kept in indoor storage facility near the launching ramp. I still have to rig the mast and launch her, but there is no wear and tear from the sun, or algae from the water, and she also stays clean from not being trailered very far.
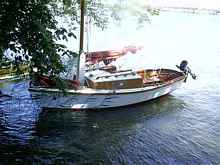 |
60 Grit at the 2008 Rend Lake Messabout
The deck and cabintop are cream-colored latex enamel deck and floor paint, which is nicely low-skid on its own. The bottom is dark-red exterior latex enamel. It was tough to get this color to cover, even over the previous white paint, but it looks just like marine bottom paint.
The tabernacle makes it easier, and possible at my age now, to raise the heavy mast. But it's still difficult to lift it over my head while stepping from the cockpit to the cabintop. It’s also difficult to lower the mast safely, so further work is needed in this area. |
I finally achieved my *ultimate goal* at the Cedar Key Small Craft Meet in 1998. I trailered down a few days early, and cruised up the coast to the East Branch of the Suwannee River, then back to Atsena Otie the next day and anchored in the lagoon, before sailing back to the meet on Friday. Since then I've cruised to Cayo Costa in Pine Island Sound, and Dog Island in Apalachicola Bay. And locally I've sailed and anchored out many nights and weekends on various Midwest lakes.
The End
Other Articles by Larry Appelbaum:
2009 Florida Vacation
|